A complete guide to extreme close-up photography — gear, settings, subjects, technique, and the physics that make macro unlike any other kind of shooting.
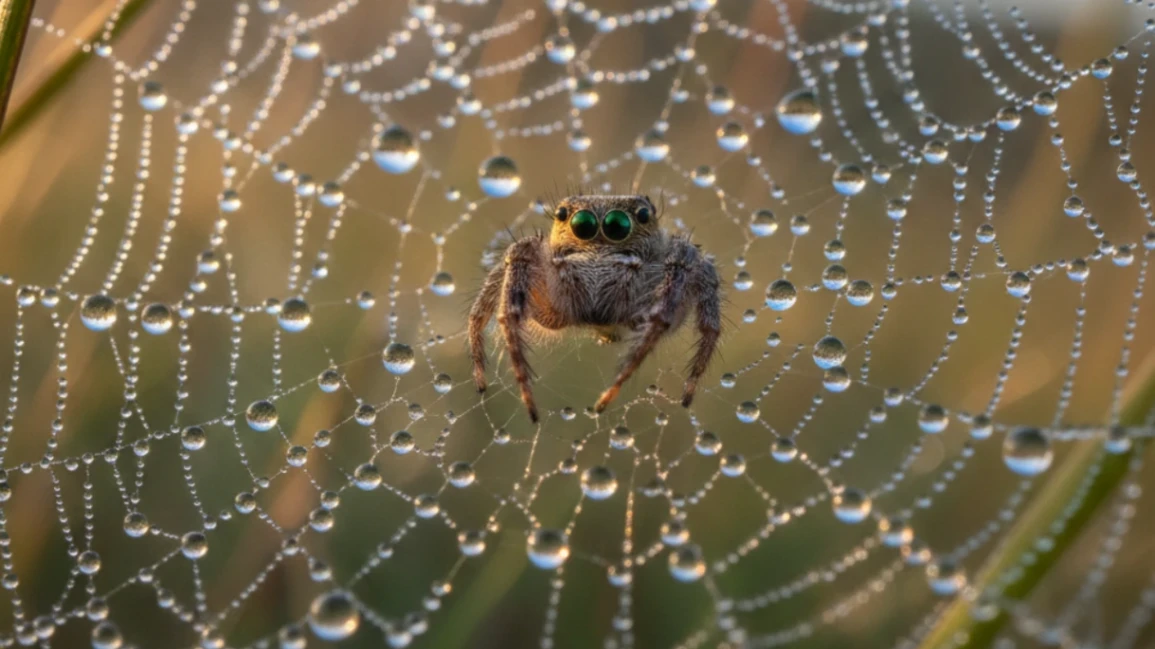
Macro photography turns the invisible into the extraordinary. A compound eye, the architecture of a snowflake, the hairs on a bee's leg — things that exist all around you become entire worlds when photographed at true close-up scale. The challenge is physics, not artistry. This guide explains both.
What Macro Photography Actually Is
Macro photography is close-up photography in which small subjects are reproduced at or near life-size on the camera sensor. The technical definition of true macro is a 1:1 reproduction ratio, meaning a 10mm subject fills exactly 10mm of the sensor. In everyday use the term extends to any extreme close-up work, but the 1:1 benchmark is a useful standard because it is where the physics of close focusing become genuinely demanding.
Those physics are what make macro different from every other kind of photography. As you move closer to a subject, depth of field collapses. At 1:1 on a full-frame sensor, the in-focus zone at f/8 may be less than two millimetres deep. A single millimetre of camera movement shifts an insect's eye completely out of focus. Every variable that is manageable in normal photography — camera shake, wind, breathing, autofocus error — becomes magnified and consequential at macro distances.
That constraint is also the source of macro's appeal. Solving the physics problem in each shot requires a kind of methodical patience that other photography does not demand. The results, when the technique comes together, are images that genuinely could not exist in any other medium — a world of detail that the human eye passes every day without perceiving.
Subjects and Approaches to Explore
[object Object],[object Object],[object Object],[object Object]
Start with flowers in a garden or a vase indoors before attempting live insects or water drops. They stay still, respond well to natural light from a window, and reward imperfect technique with images that still look good. Two weeks shooting flowers teaches you more about macro focus and depth of field management than any amount of reading will.
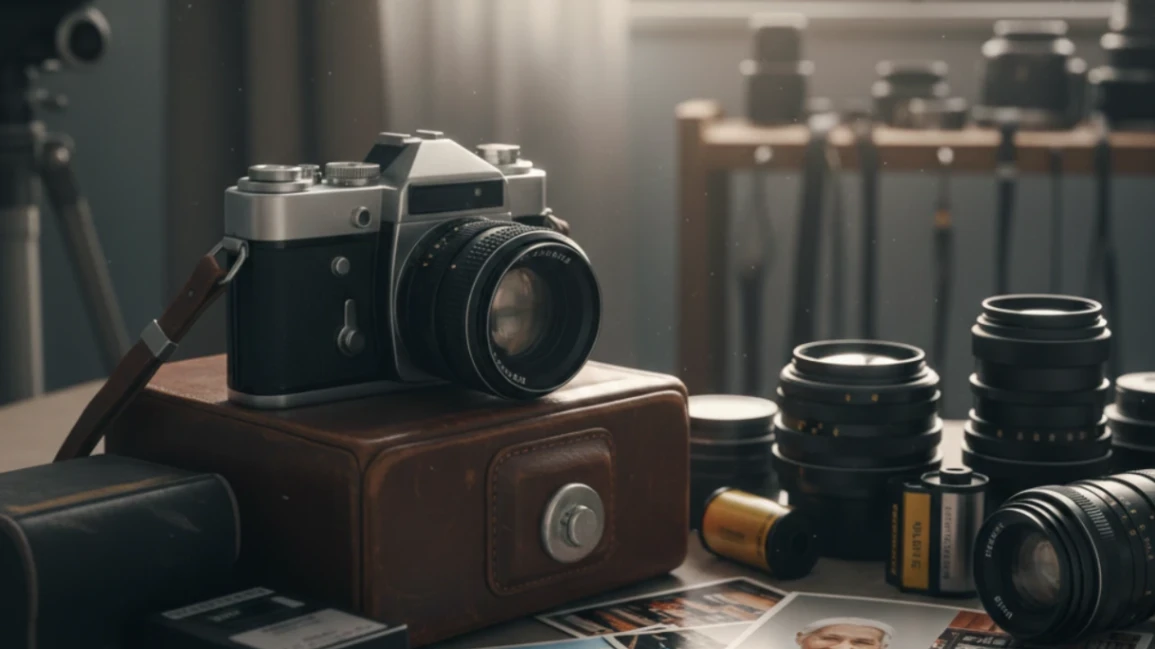
Gear You Will Need
Macro is one of the few photography disciplines where the most expensive option is not necessarily the best starting point. Here is a practical breakdown from cheapest to most capable:
The non-negotiables — you need these before your first session. No upsell here, just what actually matters to get started safely.
External Flash (Speedlight)
Diffuser for External Flash
Worth it once you're committed. These items meaningfully improve your experience and are often bought within the first few months.
The 100mm f/2.8 macro is the most recommended focal length for beginners because it provides enough working distance to avoid casting a shadow over small subjects or disturbing live insects. A 60mm macro puts the lens closer to the subject for the same reproduction ratio, which is limiting outdoors. A used Canon 100mm, Tamron 90mm, or Nikon 105mm macro from a reputable seller is the most effective single investment in this discipline.
There are three distinct ways to achieve macro magnification, each with different tradeoffs. Understanding them before buying anything saves money and time:
| Method | Cost | Magnification | Best For | Limitation |
|---|---|---|---|---|
| Close-up filters | $12–$30 | Low to moderate | Testing the hobby, travel | Reduces image sharpness at edges |
| Extension tubes | $15–$40 | Moderate (depends on lens) | Entry-level macro on any lens | Loses infinity focus, no optical elements |
| Macro lens | $200–$600 | True 1:1 | All macro work, best image quality | Higher cost, single-purpose |
| Reversed lens | $5–$15 adapter | Very high (beyond 1:1) | Extreme magnification experiments | Manual only, fragile, limited light |
Interactive Buyer's Guide
Compare all tiers, track what you own, see your full budget.
How to Get Started Step by Step
Start with extension tubes, not a macro lens
Extension tubes fit between your camera body and any existing lens, forcing it to focus closer. They cost $15 to $40, produce genuine macro results, and tell you whether the hobby is worth investing in before spending $300 on a dedicated lens.
Switch to manual focus
Autofocus hunts continuously at macro distances and rarely locks on the part of the subject you actually want in focus. Manual focus with live view magnification on your camera's screen gives you precise, repeatable control that autofocus cannot match at this scale.
Focus by moving your body, not the focus ring
Set your focus distance and rock your body forward and backward to find the focus point. At macro distances, this covers the focus range faster and more smoothly than turning the ring, and it keeps your hands still on the camera body.
Shoot at f/8 to f/11 to start
Wide apertures produce beautiful blur but a focus plane too thin to work with as a beginner. Narrower than f/16 introduces diffraction softness. f/8 to f/11 is where macro images are typically sharpest across a workable depth of field.
Use a tripod or shoot at 1/500s or faster
Camera shake that is invisible at normal shooting distances is pronounced at macro scale. A tripod eliminates it for static subjects. For moving subjects, a shutter speed of 1/500s or faster freezes the movement enough to get sharp frames.
Review images at 100% zoom on a computer
A macro shot that looks sharp on the camera's rear screen may be visibly soft when viewed at full size. Reviewing on a computer screen teaches you the difference between acceptable and genuinely sharp, and reveals what went wrong in shots that missed.
What to Expect in Your First Sessions
Here's what typically happens when you start — and why it's useful information, not failure.
The keeper rate will be very low. Professional macro photographers routinely shoot 80 to 150 frames to get 3 to 5 keepers. At 1:1 magnification, the margin for error in focus and camera movement is so small that a high discard rate is simply part of the process, not a sign of failure.
Focus will miss the part of the subject you wanted. At macro distances, the difference between a bee's eye being in focus and its antenna being in focus is a millimetre of camera movement. Learning to anticipate where the focus plane will land before pressing the shutter takes time and a lot of frames.
Wind will ruin outdoor shots. A subject that looks perfectly still to the eye is moving constantly at macro scale. Still days and early mornings produce significantly more keepers than breezy afternoons. This is not something technique can overcome — it is a condition to work around.
Getting close blocks the light. The lens positioned centimetres from a subject casts a shadow over it. You will need to add light from a ring flash, a small LED held to the side, or a folded piece of white card acting as a reflector. Learning to manage light at this proximity is a skill specific to macro that takes adjustment.
A single sharp frame will make the whole session worthwhile. When the focus, light, and timing come together in a macro shot, the result is an image that is simply not achievable any other way. That frame, appearing unexpectedly after forty failed attempts, is what creates macro photographers.
Beginner Tips That Actually Help
Shoot in the morning and in calm conditions
Early morning combines two advantages for macro. Insects are cold and sluggish in low temperatures, which means they move slowly and tolerate a camera held close. The light is also directional and warm rather than the flat overhead light of midday. Planning shoots for the first two hours after sunrise produces more keepers than shooting at any other time of day.
Use a black or white card as a background
A piece of matte black card held behind a flower or insect eliminates cluttered backgrounds instantly and makes the subject read cleanly against a single tone. White card creates a brighter, more clinical look. Both cost nothing and produce results that look intentional rather than accidental. Professional macro photographers use this technique routinely.
Learn focus stacking for subjects that need full depth
When the depth of field is too shallow to cover the full subject in a single frame, focus stacking combines multiple shots taken at slightly different focus positions into a single fully sharp composite. Software like Helicon Focus or Zerene Stacker handles the alignment and blending automatically. This technique is standard practice for product macro and highly detailed nature subjects like beetles and spiders.
Increase ISO rather than slowing the shutter
The instinct in low light is to slow the shutter speed. In macro, this trades one problem for another — camera shake and subject movement both become worse. Raising ISO to 800 or 1600 on a modern sensor produces acceptable noise that can be reduced in editing. A blurred image from a slow shutter has no equivalent fix.
Stabilise everything you can before shooting
If you are using a tripod, turn off image stabilisation on the lens (it can hunt and create blur rather than prevent it when the camera is already mounted). Use the camera's two-second self-timer or a remote shutter release rather than pressing the shutter button with your finger. These small habits eliminate a significant source of blur that beginners often attribute to other causes.
Study the work of photographers who specialise in macro
Photographers worth looking at closely include Thomas Shahan for insect portraits at extreme magnification, Levon Biss for the studio macro work collected in Microsculpture, and Igor Siwanowicz for compositions that treat insect subjects with the formality of classical portraiture. Understanding how they approach lighting and focus planning reveals what separates technically sharp macro from images that are genuinely arresting.
Common Questions Answered
- Can you shoot macro on a smartphone?
Many recent smartphones have a dedicated macro mode that produces reasonable close-up results. The limitations are significant — fixed aperture, small sensor, and a lens positioned millimetres from the subject — but for learning composition and subject selection before committing to camera gear, a smartphone macro mode is a legitimate starting point. The images will not match what a dedicated macro lens produces, but the visual thinking transfers directly.
- What focal length is best for macro?
100mm is the standard recommendation for beginners and remains the most versatile focal length for experienced macro shooters. It provides enough working distance to avoid disturbing live subjects and casting shadows. 60mm lenses produce the same 1:1 ratio but require the lens to be much closer to the subject, which creates practical problems outdoors. 150mm and 180mm lenses are used by insect photographers who need greater working distance, but they are heavy and expensive.
- Why do my macro shots look blurry even when the focus seems right?
At macro distances, blur comes from several sources that beginners often conflate. The most common are camera shake from pressing the shutter button (solved with a remote release or self-timer), mirror slap on DSLR cameras (solved with mirror lock-up), subject movement from wind or the subject itself, and focus being placed on the wrong part of the subject. Reviewing images at 100% on a computer rather than on the camera screen clarifies which problem is actually occurring.
- Is focus stacking necessary for beginners?
Not at the start. Learning to work with a shallow depth of field creatively — choosing which part of the subject to render sharp and letting the rest blur — is a valuable skill that focus stacking bypasses. Once you are comfortable with single-frame macro and understand what focus stacking is compensating for, it becomes a natural addition to the workflow rather than a crutch.
- How do you photograph insects without them flying away?
Early mornings in cool weather are the most reliable approach — insects cannot regulate their own body temperature and become lethargic when cold. Dew-covered subjects on grass or leaves in the first hour after sunrise are an ideal subject for this reason. Moving slowly and deliberately matters more than stealth: sudden movements trigger the flight response, but a camera moved toward a subject at a steady pace is often tolerated.
- Is macro photography expensive to get into seriously?
It can scale to any budget. Extension tubes and a 50mm lens produce real macro images for under $50. A used 100mm macro lens, tripod, and remote shutter release brings the total to around $300 and is a serious setup that will last years. Flash equipment and focus stacking software are meaningful additions beyond that, but neither is necessary to produce strong work. The discipline rewards technique more than expenditure at every level.