A complete guide to photographing the night sky — gear, camera settings, locations, and the mistakes that cost beginners months of frustration.
Astrophotography is one of those hobbies that looks impossibly technical from the outside but becomes approachable the moment you understand a handful of core concepts. You do not need a telescope or a $3,000 camera to get started. A modern DSLR, a wide-angle lens, and a dark sky are enough to capture the Milky Way on your first serious attempt. This guide cuts through the jargon and tells you exactly what you need to know.
What Astrophotography Actually Involves
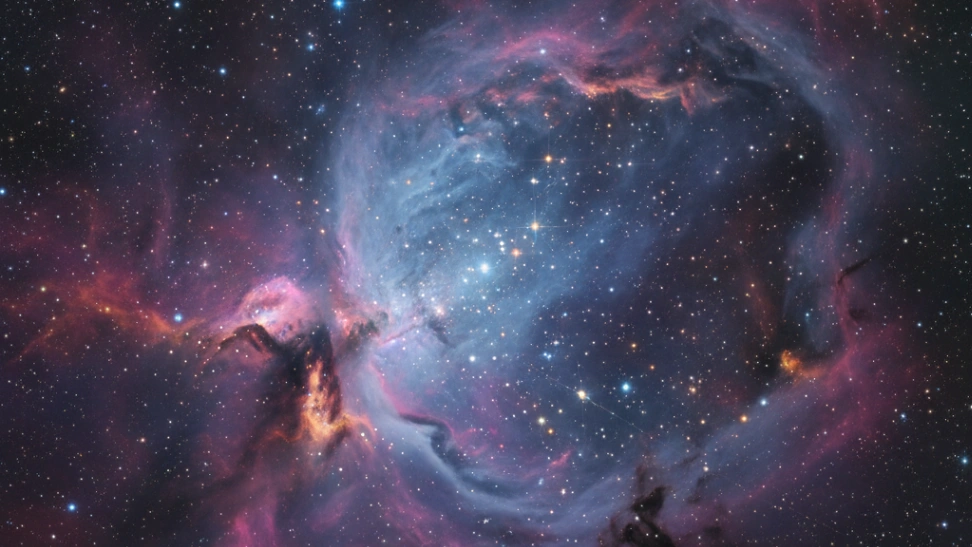
Astrophotography is the practice of photographing objects in the night sky, from the Milky Way and star trails to the Moon, planets, and deep-sky objects like nebulae and galaxies. It sits at the intersection of photography, astronomy, and post-processing, and you can engage with it at almost any level of complexity.
At the beginner end, you are pointing a camera at the sky on a tripod and capturing wide-field images of star fields or the Milky Way core. At the advanced end, you are using motorised tracking mounts, dedicated astronomy cameras, and stacking dozens of exposures in software to pull faint nebulae out of the darkness. Both are valid. Most people start at the simple end and go deeper as the hobby pulls them in.
The core challenge is light. The night sky is dark, the objects you want to photograph are faint, and camera sensors have limits. Learning to gather enough light without overexposing bright objects, blurring stars from Earth's rotation, or introducing too much noise is what the learning curve is mostly about.
Types of Astrophotography to Explore
[object Object],[object Object],[object Object],[object Object],[object Object]
Start with Milky Way nightscapes or star trails. Both are achievable with entry-level gear, do not require a telescope, and produce visually impressive results that will motivate you to go deeper. Master your camera settings on these before moving to planetary or deep sky work.
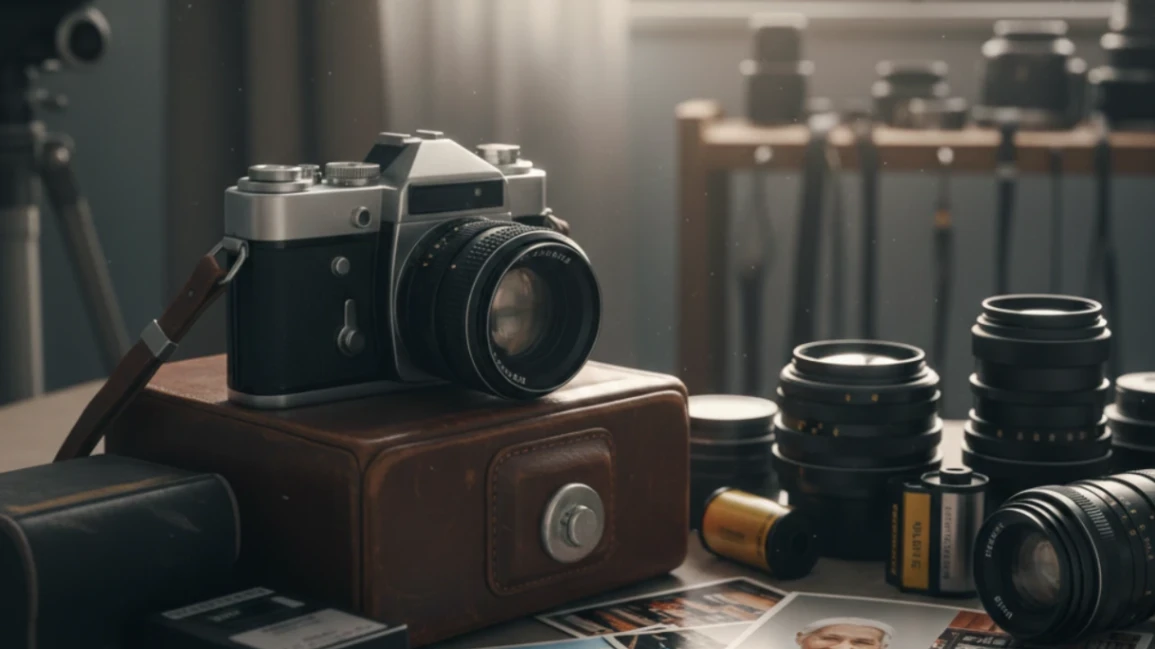
Basic Gear You'll Need
The non-negotiables — you need these before your first session. No upsell here, just what actually matters to get started safely.
Adaptors and Accessories
Image Processing Software
Worth it once you're committed. These items meaningfully improve your experience and are often bought within the first few months.
Interactive Buyer's Guide
Compare all tiers, track what you own, see your full budget.
How to Get Started Step by Step
Learn the 500 rule for sharp stars
Divide 500 by your focal length to get your maximum shutter speed before stars trail. On a 24mm lens, that is roughly 20 seconds. This is where you start.
Set your camera to manual mode
Auto modes cannot handle night sky exposures. You need full control over aperture, shutter speed, and ISO. There is no shortcut around learning this.
Use your widest, fastest lens
A wide aperture (f/1.8 to f/2.8) lets in dramatically more light than a kit lens at f/5.6. If you own a 50mm f/1.8, start there.
Find a dark sky location
Light pollution is the biggest obstacle for most beginners. Use the Light Pollution Map website to find genuinely dark sites within driving distance of where you live.
Focus on infinity manually
Autofocus cannot lock on stars. Switch to manual focus and zoom in on a bright star using live view, adjusting until it is a sharp pinpoint. Do this before it gets fully dark.
Shoot RAW and review in post
Night sky images always need post-processing. RAW files give you far more latitude than JPEGs to bring out the sky and manage noise. Lightroom or free alternatives like RawTherapee both work well.
What to Expect on Your First Night Out
Here's what typically happens when you start — and why it's useful information, not failure.
Focusing takes longer than expected. Getting sharp stars on a manual lens in the dark is genuinely tricky the first few times. Plan to spend 10 to 15 minutes on focus before you start shooting seriously.
It gets cold faster than you think. Temperatures drop sharply after sunset, especially at elevation or in open fields. Dress warmer than you think you need to. Cold hands and a cold camera are miserable.
Light pollution will surprise you. A site that looks dark from a car park can have a significant glow on the horizon. Check the light pollution map before you commit to a long drive.
Your eyes adjust slowly. Full dark adaptation takes 20 to 30 minutes. Use your red headlamp only, and avoid looking at your phone screen. The sky looks dramatically different after your eyes have fully adjusted.
The first sharp frame of the Milky Way is genuinely arresting. Even beginners who have seen thousands of astrophotos online report that seeing it on their own camera screen for the first time is a different experience entirely. It will hook you.
Beginner Tips That Actually Help
Plan your shot before you leave home
Use an app like PhotoPills or Stellarium to plan exactly where the Milky Way core will be at the time you intend to shoot. Arriving at a location without knowing where to point your camera is a common beginner mistake. Good astrophotography is mostly planning.
Shoot around the new moon
Moonlight is beautiful but it washes out faint stars and the Milky Way completely. The week before and after a new moon gives you the darkest skies of the month. Check the lunar calendar and plan your trips around it from the start.
Take test shots as soon as you arrive
Do not wait for full darkness to start experimenting. Take test exposures during twilight to dial in your composition and check your focus. By the time the sky is fully dark, you want to be shooting, not troubleshooting.
Shoot more frames than you think you need
Stacking multiple exposures of the same scene in post-processing dramatically reduces noise without losing detail. Even on a static tripod, shooting 10 to 20 frames and median stacking them in Sequator (free software) will give you cleaner results than a single long exposure.
Avoid JPEG sharpening traps in post
It is tempting to over-sharpen night sky images because stars look soft fresh out of camera. Excessive sharpening creates ugly halos around bright stars. Apply sharpening selectively to the foreground, not the sky.
Bring a camping chair
This sounds trivial but long exposure sequences take time. Standing in the cold for an hour while your intervalometer runs is unpleasant. A chair, a flask of coffee, and a clear sky is one of the more enjoyable ways to spend an evening.
Common Questions Answered
- Do I need a telescope to start astrophotography?
No. Wide-field Milky Way and nightscape photography requires only a camera and a lens. Telescopes become relevant when you want to photograph specific deep sky objects or planets in detail. Most beginners get years of shooting done before a telescope becomes necessary.
- What ISO should I use for night sky photography?
On most modern DSLRs, ISO 1600 to ISO 3200 is a solid starting range for Milky Way work. Higher ISOs gather more light but introduce more noise. The right ISO depends on your specific camera and how much noise your sensor produces at higher values. Test your camera at home before your first dark sky trip.
- Can I do astrophotography from a city?
Lunar photography works fine from a city because the Moon is so bright that light pollution is not a factor. For stars and the Milky Way, you need to get out of the city. Even a 30 to 60 minute drive to a semi-rural area makes a significant difference. The light pollution map at lightpollutionmap.info shows exactly what you are dealing with.
- What is a tracking mount and do I need one?
A tracking mount rotates your camera to counteract Earth's rotation, allowing you to shoot longer exposures without stars trailing. You do not need one to start. A static tripod with exposures under 20 to 25 seconds produces sharp stars for wide-angle work. A tracker becomes valuable when you want to use longer focal lengths or shoot very faint objects that require several minutes of exposure.
- Is astrophotography a good hobby for someone who has never done serious photography?
It has a steeper learning curve than casual photography because you have to shoot entirely in manual mode and understand exposure well. That said, the feedback is immediate and the motivation to improve is high. Most beginners pick up the necessary camera skills within a few sessions. The planning and location scouting side of the hobby is accessible from day one.
- What post-processing software should I use?
Adobe Lightroom is the most popular choice and handles basic night sky processing well. For stacking multiple exposures to reduce noise, Sequator is free and straightforward. More advanced deep sky processing is typically done in PixInsight, which has a steep learning curve but is the industry standard for serious work. Start with Lightroom and add tools as your needs grow.