Best Red Light for Stargazing (2026): Protecting 30 Minutes of Night Vision
Dark adaptation takes about thirty minutes and one careless glance at a phone screen to undo. That is the entire argument for a red light: not that red is magic, but that your eyes recover from it far faster than from white. Almost every stargazing session that "was not very good" was actually a session where someone kept checking their phone.
HobbyStack may earn a commission from links on this page at no extra cost to you. Our picks are chosen on merit; the commission helps fund the research.
- Full dark adaptation takes 20-30 minutes, and white light resets most of it in seconds.
- Red preserves it because the rod cells that give you night vision are far less sensitive to red wavelengths.
- Brightness matters more than colour. A blazing red light still ruins your night vision.
- You want a dimmable light, or the dimmest usable one — not the brightest red one you can find.
- A headlamp beats a torch when you need both hands for a telescope or a star chart.
 WAYLLSHINE Red LED FlashlightCheapest that works$7Check price
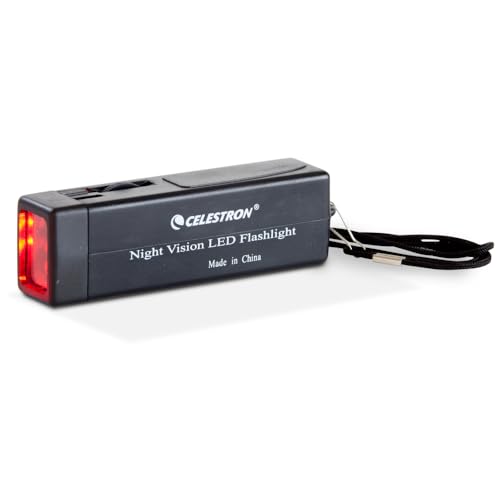 Our pickCelestron Night Vision FlashlightMost people$17Check price
 Celestron Night Vision HeadlampHands-free at the scope$18Check price
What dark adaptation actually is
Your retina has two kinds of receptor. Cones handle colour and detail and need decent light. Rods handle low light, and they are what you see faint stars with.
Rods work using a pigment called rhodopsin, which is bleached by light and takes time to regenerate. That regeneration is why your eyes keep improving for twenty to thirty minutes after you step outside, and why the last ten minutes of it make a surprising difference to what you can see.
White light bleaches rhodopsin comprehensively, and you start the clock again. Red light does so far less, because rods are much less sensitive at long wavelengths — so you can read a star chart and keep most of your adaptation.
The practical consequence: a phone screen at full brightness costs you the entire half hour. Even in night mode it is worth turning the brightness right down and keeping it face-down between glances.
Brightness matters more than colour
This is the part that surprises people. A very bright red light still bleaches rhodopsin — the wavelength helps, but intensity is doing most of the damage.
Cheap red torches are often far brighter than you need, because torch marketing is a lumens arms race. You want the dimmest light you can still use, not the brightest red one available.
So the feature to look for is dimming, not raw output. Being able to turn it down to a faint glow to read a chart, and up slightly to find a dropped eyepiece in the grass, is what actually makes a light useful over a whole session.
If your light has no dimmer, the traditional fix is a layer or two of red cellophane or tape over the lens — which is also how people convert a torch they already own.
 Cheapest that works
WAYLLSHINE Red LED Flashlight
A single-mode red LED torch at a price where you can keep one in every coat pocket and the car, which is genuinely the right way to own these — the light you actually use is the one you did not have to go and fetch. It does the essential job: red output that leaves most of your dark adaptation intact while you find something in a bag or glance at a chart. The compromise is control. One brightness, and it is brighter than ideal for reading a chart at arm's length, so expect to shield it with a hand or point it at the ground and use the spill. No dimming means no fine adjustment as your eyes get better through a session.
What's good
- Cheap enough to own several
- Proper red LED, not a white light with a filter
- Pocket sized
- Simple — nothing to fail
What's not
- Single brightness, no dimming
- Brighter than ideal for chart reading
- Basic build
- Easy to lose in the dark
 Best for most people
Celestron Astro Night Vision Flashlight
A red torch made for astronomy rather than adapted to it, and the difference that matters is dimming. Being able to drop the output to a faint glow for reading a chart and raise it a little to find something you dropped is what makes a light usable across a whole session — with a single-brightness torch you end up shielding it with your fingers all night. It is built for being outside in the cold and dark, with a switch you can find and work in gloves, which is a small thing that becomes a large one at two in the morning. Not much more than the cheapest option, and it is the one that will still be in your bag in five years.
What's good
- Dimmable — the feature that actually matters
- Switch you can find and work in gloves
- Built for cold, dark, outdoor use
- Barely more than the budget torch
What's not
- Still needs a free hand
- Bulkier than a pocket torch
- Battery to remember
- Plain build for the price
 Best hands-free
Celestron – Night Vision Headlamp – Multiple Light Modes
A head-mounted red light, and the case for it is simple: setting up a telescope, collimating, changing an eyepiece and holding a star chart are all two-handed jobs, and a torch means doing them one-handed or gripping a light in your teeth. Multiple modes let you dial the output down to chart-reading level and up when you are packing away in the dark. The trade-offs are real. It points wherever you are looking, so you will occasionally blind whoever you are observing with — worth a word of warning to them first — and a headband is less comfortable over a hat than a torch in a pocket. Buy it if you use a telescope; a torch is fine for naked-eye and binocular nights.
What's good
- Both hands free at the telescope
- Multiple output modes
- Always pointing where you look
- Comfortable enough for long sessions
What's not
- Blinds companions if you turn to speak
- Headband over a hat is awkward
- Most expensive here
- Overkill for binocular observing
A phone at normal brightness undoes a full half hour of dark adaptation in about a second. Turn the brightness to minimum before you go out, use a red-filter or night mode if you have one, and keep it face-down. Most ruined observing sessions are a phone rather than a torch.
Making one from what you own
You do not have to buy anything to start. A layer or two of red cellophane, a red balloon stretched over the lens, or a few passes of red tape over a torch you already own will get you most of the way — and adding layers is a crude but effective dimmer.
What you lose is convenience and consistency: home-made filters slip off, tear, and let white light leak round the edges, which rather defeats the purpose.
Given a purpose-built red torch costs less than a takeaway, the DIY route is best treated as a way to try a session before deciding, rather than a permanent answer.
Before you buy
Prioritise dimming over brightness. Bright red still costs you night vision.
Get outside twenty to thirty minutes before you expect to see much.
Turn your phone brightness to minimum before you leave the house.
Headlamp if you use a telescope, torch if you observe with binoculars.
Warn companions before turning your head towards them wearing a headlamp.
Red light questions
Why do astronomers use red light?
Does a bright red light still ruin night vision?
Can I just use my phone on night mode?
How long does dark adaptation take?
Buy a red light you can dim, not the brightest one you can find — intensity does most of the damage to night vision, and the wavelength only helps. The Celestron dimmable torch is the right choice for most people and costs very little. Take the headlamp if you use a telescope and need both hands. The single-mode pocket torch is genuinely fine as a spare. Then get outside half an hour early and turn your phone brightness down before you leave.
Ready to actually do it?
The first stargazing quest takes an evening, and it tells you whether the gear was worth it better than any review can.
Start StargazingThe HobbyStack editorial team researches each guide against manufacturer specifications, published resources and practitioner sources. Every product is checked for availability and described against its current listing before publication, and prices are re-checked when guides are updated.
About our editorial process →More gear guides
All guides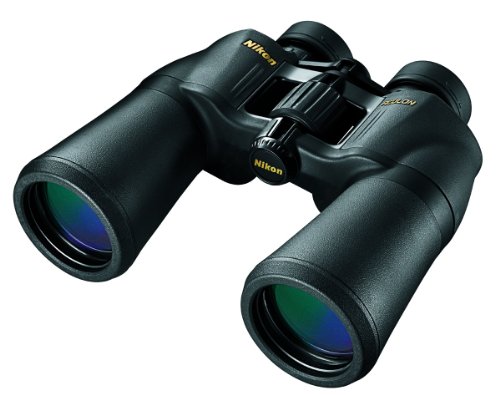
Best Binoculars for Stargazing 2026: Nikon Aculon vs Celestron Cometron vs SkyMaster
You don't need a telescope to start stargazing: for most beginners, a good pair of binoculars is the smarter first buy. Here are three honest picks for the night sky, from a forgiving budget pair to a deep-sky aperture monster, with the two numbers that actually decide which is right for you.

Best Binoculars for Birdwatching (2026): Why 8x42 Is the Sweet Spot
For birdwatching, one pair of numbers matters more than any brand: 8x42. That is 8x magnification (easy to hold steady, with a wide view to find birds) and a 42mm lens (bright enough for shade and dawn). Get that spec and you are most of the way there. Here are three good 8x42 binoculars, from a superb-value first pair to premium glass you grow into.

Best Beginner Telescope 2026: 3 Honest Picks for First-Time Buyers
Orion Telescopes shut down in 2025, so half the 'best telescope' guides online are stale. Here's a fresh take on the three telescopes worth buying as a beginner in 2026, including the one that lets your phone do the hardest part for you.

Best Binoculars for Astronomy (2026): Start Here, Not With a Telescope
The standard advice in astronomy is to buy binoculars before a telescope, and it is right. A cheap telescope is usually a wobbly mount holding a small lens, and it shows you less than a decent pair of binoculars while being far harder to point. Binoculars are also the thing you keep using afterwards — even people with serious telescopes reach for them first.

Best Telescope Eyepieces for Beginners (2026): 3 Real Picks
Almost every beginner telescope ships with one or two cheap eyepieces, and upgrading them is the single biggest improvement you can make without buying a new scope. The eyepiece decides your magnification, how wide a view you get, and how comfortable it is to actually look through, and the bundled ones are usually the part the manufacturer saved money on. One thing to understand first: magnification is not a number you should chase. It comes from your telescope's focal length divided by the eyepiece's, and going too high just gives you a big, dim, blurry image. Here is what to buy and why.
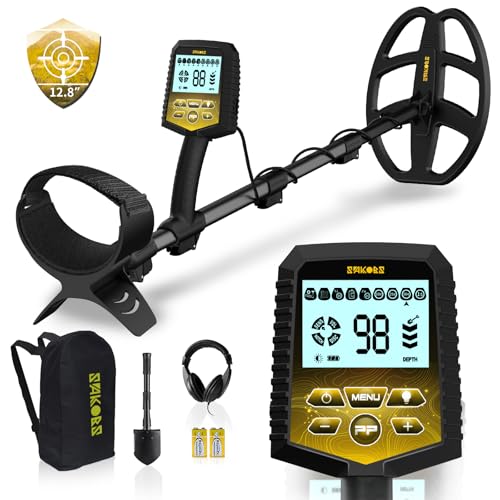
Best Beginner Metal Detector 2026: Nokta Simplex vs Minelab Vanquish
A good beginner detector is one that can tell treasure from trash, which rules out the sub-$100 toys. Spend a bit more and you get discrimination, target ID, and waterproofing that actually find things. Here are three real beginner detectors, from a simple waterproof entry to a buy-it-once multi-frequency machine.