A complete guide to working iron and steel — setting up a forge, understanding heat, learning the fundamental techniques, and making things that last a lifetime.
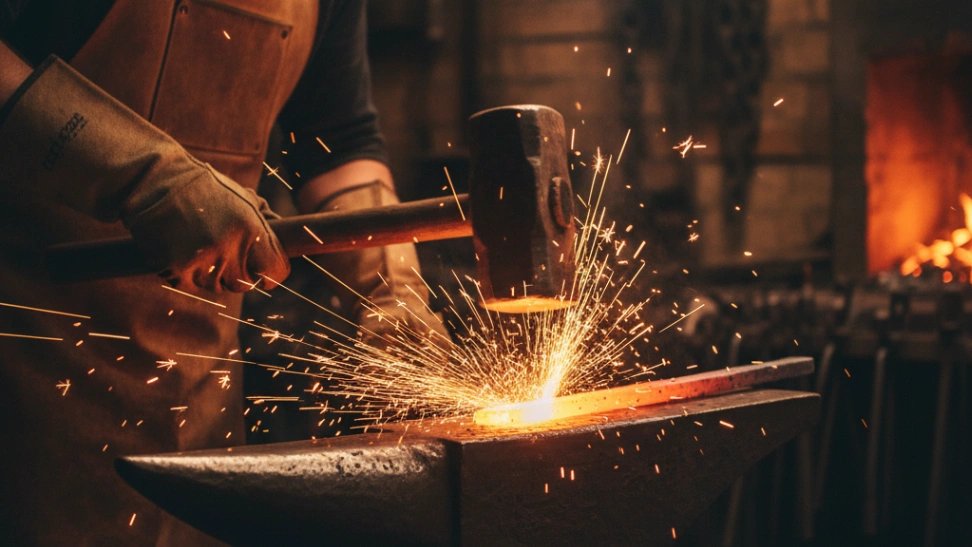
Blacksmithing is the most direct conversation between a person and metal that exists. You heat steel until it becomes plastic, shape it with hammer and anvil while it glows, and the result is determined entirely by what you do in those seconds between the forge and the quench. There is no undo. There is no revision. There is only what the metal remembers. That immediacy is what makes blacksmithing unlike any other craft.
What Blacksmithing Actually Involves
Blacksmithing is the craft of heating iron or steel in a forge until it becomes soft enough to shape, then working it with hammer, anvil, and hand tools to produce a desired form. The name comes from the colour of the iron worked — black metal, as opposed to bright metals like gold and silver worked by goldsmiths and silversmiths. It is among the oldest metal crafts, with a history stretching back over three thousand years, and the fundamental process has changed less than almost any other technology in human use.
The core skill of blacksmithing is reading heat. Steel at different temperatures behaves in fundamentally different ways. Too cold and it resists the hammer, cracks, or work-hardens unpredictably. Too hot and it burns, becoming granular and weak. The correct working temperature is a narrow window, and learning to identify it by colour — which changes from black through cherry red, orange, and yellow to white at forge-welding temperatures — is the first and most essential skill the craft demands. That skill cannot be learned from a book. It only comes from time at the forge.
What blacksmithing produces is not just objects but understanding of material at a level that no other metal craft provides. Working steel by hand over heat teaches you what the material is, how it responds to force at different temperatures, and how its internal structure changes through heating and cooling. That understanding is transferable across every other metalworking discipline and gives blacksmiths an intuitive relationship with ferrous metal that formal metallurgy education produces only abstractly.
Disciplines and Directions to Explore
Hammer and Tong Forging
The foundational discipline. Working bar stock at the forge with hammer and anvil to produce hooks, tools, hardware, and decorative ironwork. The techniques of drawing out, upsetting, punching, drifting, and bending are all learned here and apply across every other branch of blacksmithing. Most beginners spend their first year entirely in this territory and find it more than sufficient to stay engaged.
Bladesmithing
Forging knives, swords, and edged tools. Bladesmithing requires everything general blacksmithing teaches and adds the disciplines of heat treatment — hardening and tempering steel to achieve the correct balance of hardness and toughness for an edge — and grinding, which shapes and refines the blade geometry. It is one of the most popular directions for hobby blacksmiths because the output is both functional and aesthetically compelling. Damascus steel, produced by forge-welding and folding layers of different steels, is an advanced bladesmith technique with a devoted following.
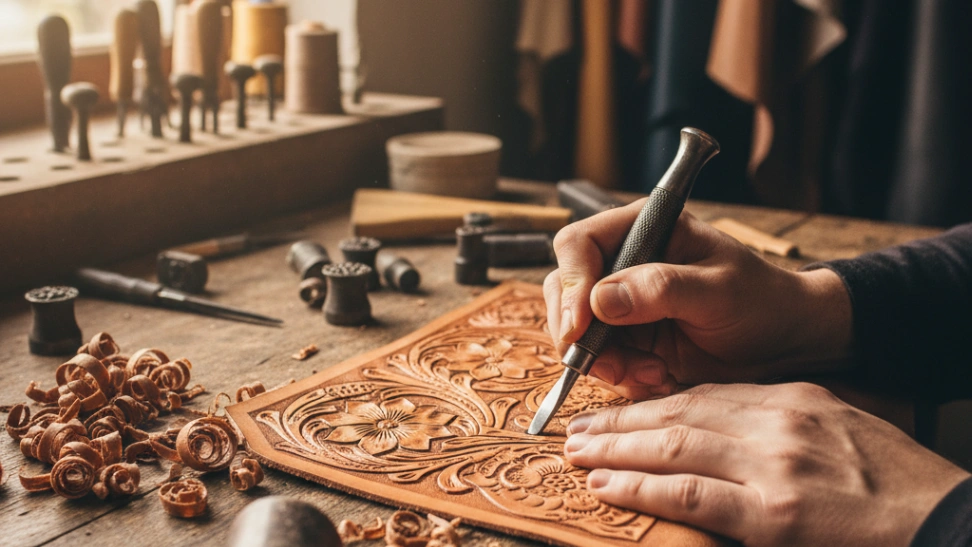
Architectural and Decorative Ironwork
Gates, railings, hinges, fire tools, furniture legs, and sculptural ironwork. This branch of blacksmithing demands both technical skill and design sense. The long history of European decorative ironwork — particularly the scrollwork and leaf forms of Gothic and Baroque periods — provides a deep visual tradition to draw from. Contemporary architectural smiths working in this tradition include artists whose work is installed in public buildings and private commissions worldwide.
Tool Making
Forging your own hammers, chisels, punches, and tongs from high-carbon steel and heat-treating them for working hardness. Tool making is one of the most practically satisfying branches of the craft because each tool made is immediately useful in the shop. It also teaches heat treatment thoroughly, because a tool made from improperly hardened or tempered steel fails quickly and obviously. Many experienced blacksmiths consider making your own tools a rite of passage that deepens understanding of the craft more than any other single exercise.
Farriery
The specialised craft of making and fitting horseshoes. Farriery requires a farrier's qualification in most jurisdictions and is a profession rather than a hobby discipline, but understanding its techniques — hot fitting, shaping shoes to foot, nail placement — is part of the broader blacksmithing tradition and still practiced by hobby smiths interested in equine work.
Take an introductory blacksmithing class before buying any equipment. A one or two day beginner workshop at a local smithy or community college gives you direct instruction, access to a fully equipped forge, and enough experience to know whether the craft suits you before spending $500 to $1,500 on a home setup. Most people who take a class and continue into the hobby say it was the most efficient use of time and money they made at the start.
Equipment You Will Need
Blacksmithing requires more initial investment than most craft hobbies because the core equipment — forge, anvil, and post vice — is heavy, specialised, and not cheap. The good news is that most of it lasts indefinitely with basic maintenance, and the second-hand market for blacksmithing equipment is well established. Here is what a functional beginner setup requires:
The non-negotiables — you need these before your first session. No upsell here, just what actually matters to get started safely.
Blacksmithing Hammer
Worth it once you're committed. These items meaningfully improve your experience and are often bought within the first few months.
Chisels and Punches
Reading heat colour correctly is the technical foundation everything else rests on. Here is a practical reference for the colour-to-temperature relationship in steel:
| Colour | Approx. Temperature | Steel Behaviour | Best Used For |
|---|---|---|---|
| Black heat | Below 400°F | Hard, brittle, resists hammer | Do not strike — risk of cracking |
| Faint red | 900 to 1000°F | Very stiff, marginal workability | Light straightening only |
| Cherry red | 1400 to 1500°F | Workable but still resistant | Bending, light shaping on mild steel |
| Bright orange | 1800 to 2000°F | Soft and plastic, moves easily | Drawing out, upsetting, general forging |
| Yellow | 2000 to 2200°F | Very soft, moves with minimal force | Punching, drifting, welding prep |
| White | 2300°F and above | Approaching burning, sparks visible | Forge welding only — risk of burning |
Interactive Buyer's Guide
Compare all tiers, track what you own, see your full budget.
How to Get Started Step by Step
Learn to read heat colour before anything else
Steel colour at temperature tells you everything about when to strike and when to stop. Black heat means the steel is too cold to work safely. Cherry red is the minimum working temperature for most operations. Bright orange to yellow is the ideal forging range. White heat approaches forge-welding temperature and risks burning the metal. Developing this colour-reading instinct is the central skill of the craft and takes deliberate, repeated practice.
Start with mild steel, not high-carbon steel
Mild steel — low-carbon construction steel — is forgiving, widely available, cheap, and does not require heat treatment after forging. High-carbon steel produces harder, stronger tools and blades but cracks if worked at the wrong temperature and must be properly hardened and tempered after forging. Learn the fundamentals on mild steel before adding the complexity of carbon management.
Let the heat do the work
The single most common beginner mistake is striking steel that is too cold. Cold steel resists the hammer, forces you to hit harder, fatigues your arm, and risks cracking the metal along its grain. Steel at proper forging temperature moves easily under a medium blow. If you are working hard to move the metal, the metal is telling you it needs more heat. Return it to the forge.
Work the whole piece, not just one spot
Beginners naturally focus hammer blows on the area they want to change and ignore the rest of the bar. Uneven heating and hammering creates unpredictable internal stresses and distorts the work in ways that are hard to correct. Moving the steel in the forge to heat it evenly and rotating the work under the hammer produces cleaner, more controllable results from the first session.
Finish the surface before it cools
Scale — the flaky iron oxide that forms on hot steel — embeds into the surface if hammered in rather than brushed off between heats. Keeping a wire brush at the anvil and quickly brushing scale off the steel before the final hammer blows of each heat produces a cleaner surface that requires less grinding and finishing work when the piece is complete.
Normalise steel after forging
Forging creates internal stresses in steel from uneven heating and hammering. Normalising — heating the finished piece evenly to a medium orange and allowing it to air cool slowly — relieves those stresses and refines the grain structure. For mild steel decorative work this step is optional. For tools and blades it is essential and prevents cracking during hardening or under working stress.
What to Expect in Your First Sessions
Here's what typically happens when you start — and why it's useful information, not failure.
Your arm will tire faster than you expect.
Swinging a 2-pound hammer repeatedly over an hour is genuinely demanding physical work, especially when you are tensing against missed blows or compensating for an awkward stance. Fatigue leads to inaccurate hammer placement, which leads to frustration. Short sessions of 30 to 45 minutes are more productive than long sessions for a beginner, because quality of attention matters more than quantity of time at the anvil.
You will miss the target.
Accurate hammer placement — hitting exactly where you intend on the face of the anvil — takes time to develop. In the early sessions expect glancing blows, off-centre strikes, and occasional hammer marks where they do not belong. These improve quickly with practice. Drawing a chalk circle on the anvil face and practising dry hammer strikes without hot metal is a technique many beginners use to accelerate this development.
The heat will run out faster than you planned.
A piece of steel brought to bright orange cools to black heat in less than 60 seconds depending on its mass. Beginners frequently find themselves planning a sequence of operations that requires more working time than the heat actually provides. Learning to work economically — to accomplish one clear objective per heat rather than attempting several — is a discipline that develops over the first month of forging.
Sparks and scale are normal and manageable.
Hot scale flies from steel under the hammer and sparks drift from the forge. Leather boots, a leather apron, and safety glasses manage the risk to an acceptable level. Natural fibre clothing — cotton and wool — does not melt onto skin the way synthetic fibres do when hit by a spark. The workshop environment is hot, loud, and physically demanding in ways that books do not convey. Most people find they either love it immediately or know within two sessions that it is not for them.
The first finished object will matter more than it should.
A simple hook, a basic S-scroll, a leaf forged from the end of a bar — these are not technically impressive. Made by your own hands from hot steel, they feel like a different category of object from anything bought or made by other means. That response is nearly universal among beginners and is exactly what this craft produces in people from the very first session.
Beginner Tips That Actually Help
Set up the forge, anvil, and vice at the right heights
The anvil should be at the height where your knuckles brush its face when you stand beside it with arms relaxed at your sides. Too low forces you to bend over on every strike, loading the lower back over hours of work. Too high reduces hammer force and accuracy. The vice should be at roughly the same height. These ergonomic basics are almost never discussed in beginner content and matter enormously for sessions longer than twenty minutes.
Grip the hammer loosely on the downswing
A death grip on the hammer handle transmits all the shock of each blow back through your wrist and elbow. Gripping firmly only at the moment of impact and allowing the handle to rotate slightly in the hand on the upswing is the technique used by every experienced smith and the one that makes eight-hour forging sessions possible without injury. It feels unnatural at first and becomes instinctive within a few weeks of regular practice.
Make a nail before anything else
Forging a nail from a length of square stock is the traditional first blacksmithing exercise for good reasons. It requires drawing out a taper, cutting the shank to length, and heading the nail over the anvil horn — covering three fundamental techniques in a single small project that takes one heat to complete. Forging twenty nails in a session produces more technique improvement than any other exercise and costs almost nothing in materials.
Join a local blacksmithing association
The Artist Blacksmith Association of North America, the British Artist Blacksmiths Association, and their regional equivalents run workshops, hammer-ins, and open forge days that provide access to experienced smiths who will watch your technique and correct it in real time. Online videos teach concepts but cannot see what your hammer is doing. An experienced smith watching you work for ten minutes will identify and correct errors that you might otherwise ingrain over months of solo practice. The blacksmithing community is notably generous with time and knowledge.
Control scale from the beginning
Scale — the iron oxide that forms on hot steel — is abrasive enough to damage your anvil face if hammered in repeatedly over time. Brushing scale off the work with a wire brush before each set of hammer blows is a habit worth building from the first session. Flux, a borax-based powder thrown onto steel at high heat, prevents scale formation and is essential for forge welding. Using it consistently in welding operations also keeps the anvil face cleaner.
Study the work of historical and contemporary smiths
The history of blacksmithing produces an enormous visual vocabulary of forms, techniques, and applications. Samuel Yellin's architectural ironwork from the early twentieth century remains the benchmark for decorative smithing in America. The knife work coming from contemporary bladesmiths like Murray Carter and Walter Sorrells demonstrates what modern technique and traditional Japanese influence produces. Mark Aspery's instructional books on blacksmithing fundamentals are the most thorough technical references available in English and are worth reading before and alongside practical forge time.
Common Questions Answered
- Can you blacksmith at home without a dedicated workshop?
Yes, with conditions. A propane forge can be operated outdoors or in a well-ventilated garage or outbuilding. The primary requirements are a non-combustible floor surface, adequate ventilation to prevent carbon monoxide accumulation, clearance around the forge for safety, and consideration for noise — hammering on an anvil produces significant impact noise that travels through structures and across property lines. Rural or semi-rural settings are considerably more practical than dense residential ones. A solid concrete or packed earth floor, a propane forge on a steel stand, and an anvil mounted on a hardwood stump is a functional outdoor setup that costs less than a thousand dollars and fits in a space the size of a parking space.
- Coal forge or propane forge for a beginner?
Propane for most beginners. A propane forge is cleaner, requires no fire management skill, heats up in minutes, and produces consistent, controllable heat without the complexity of building and maintaining a coal fire. Coal forges burn hotter and produce a reducing atmosphere that some smiths prefer for forge welding, and they have a traditional quality that many practitioners value. The skill of managing a coal fire is itself worth learning eventually, but it adds a layer of complexity to early sessions that is better addressed after the hammer and anvil fundamentals are established.
- What steel should a beginner start with?
1018 or A36 mild steel in 1/2 inch and 3/4 inch square bar stock. Mild steel is inexpensive, widely available at steel suppliers and metal recycling yards, forgiving of temperature errors, and does not require heat treatment after forging. Rebar is technically workable but inconsistent in composition and not recommended. Once the basics are established, 1084 high-carbon steel is the standard entry point for bladesmithing because it is straightforward to heat treat and produces excellent edge-holding properties.
- Is blacksmithing dangerous?
It involves genuine hazards that require respect and management rather than fear. Hot metal, flying scale, moving hammers, and a hot forge are all present in every session. The risk profile is manageable with appropriate personal protection — leather boots, leather apron, safety glasses, and natural fibre clothing — and sensible workshop organisation. The most significant risks for beginners are burns from handling hot steel carelessly and repetitive strain from poor hammer technique and incorrect anvil height. Both are addressed directly by learning correct technique from the start, ideally under the instruction of an experienced smith.
- How long before a beginner can make something genuinely useful?
A simple hook or a fire poker can be produced in a first session. A kitchen knife with a comfortable handle and a functional edge takes most beginners three to six months of regular forging to produce consistently. A piece of architectural ironwork — a gate latch, a decorative hinge, a candle holder — is achievable within the first month for a dedicated beginner. The progression from first heat to genuinely skilled work is measured in years, but useful and satisfying objects emerge from the first few sessions and that pattern continues throughout the craft.
- What is forge welding and how difficult is it to learn?
Forge welding is the process of heating two pieces of steel to near-white heat and hammering them together with sufficient force and speed to fuse the surfaces permanently. It is the oldest metal joining technique in existence and the foundation of Damascus steel production. It is also genuinely difficult to learn — the temperature window is narrow, the timing must be precise, and the hammer work needs to be both fast and controlled. Most blacksmiths consider it an intermediate to advanced technique that makes sense to pursue after a year or more of regular forging. When it works, the result is a joint stronger than the parent metal. When it fails, the surfaces simply do not bond and must be reheated and attempted again.