A complete guide to the craft of instrument building: choosing your first project, reading tonewoods, understanding construction methods, and finishing a playable instrument from raw materials.
Luthiery is one of the few crafts where the end product makes sound. Every decision — wood species, joint type, thickness, finish — affects not just how the instrument looks but how it resonates, how long it sustains, and how it feels under a player's hands. That direct relationship between making and music is what keeps builders coming back to the bench for decades.
What Luthiery Actually Involves
Luthiery is the craft of building and repairing stringed instruments — guitars, violins, mandolins, ukuleles, basses, and beyond. The word comes from the French luthier, originally applied to lute makers, but now used broadly for any maker of stringed instruments. The craft divides loosely into two traditions: the archtop and carved-instrument world of classical violin making, and the flattop world of guitar and folk instrument building. Both involve woodworking at tolerances far tighter than furniture.
What makes luthiery distinct from general woodworking is acoustic purpose. A guitar top is not just a flat piece of wood; it is a tuned membrane whose stiffness-to-weight ratio determines how efficiently it converts string vibration into sound. Thickness matters to within tenths of a millimetre. A neck joint held at the wrong angle by half a degree affects playability permanently. The craft rewards precision and punishes estimation in ways that furniture making does not.
At the same time, luthiery is more accessible to beginners than its reputation suggests. Kit builds provide pre-shaped parts that allow a first instrument to be completed without a full shop. Many experienced luthiers built their first playable guitar from a kit before cutting their first piece of raw wood. The learning curve is real but not as steep as the mystique around the craft implies.
Instrument Families to Explore
Steel-string acoustic guitar
The most common entry point for beginner luthiers. Strong market for knowledge, kits, plans, and community. Builds on established construction methods (X-bracing, dovetail or bolt-on neck joints) that are well-documented and forgiving of minor variation. A dreadnought or 000 body is the standard starting shape. Completing one informs every other build that follows.
Electric guitar and bass
Solid-body electrics involve woodworking without the acoustic precision demands of a hollow instrument — no bracing, no graduated tops, no complex neck sets. Bodies are routed rather than bent. This makes electrics a more manageable first build for woodworkers already comfortable with the shop. Fretwork, pickup routing, and electronics add disciplines absent from acoustic builds.
Ukulele
Small scale, simpler bracing, and lower string tension make the ukulele the most forgiving scratch-build for a first instrument. A soprano or concert ukulele body can be completed in a few weekends and requires far less wood than a guitar. The smaller dimensions make bending sides on a simple pipe bender achievable without a dedicated side bender, lowering the tool threshold considerably.
Classical guitar
Fan-braced rather than X-braced, with nylon strings at lower tension and a slightly different neck geometry to accommodate the player's hand position. Classical construction is traditional and well-preserved in instructional form — José Romanillos's Making a Spanish Guitar is the closest thing the form has to a canonical text. Requires fan brace shaping by hand, which develops skills directly transferable to fine acoustic work.
Archtop guitar and violin family
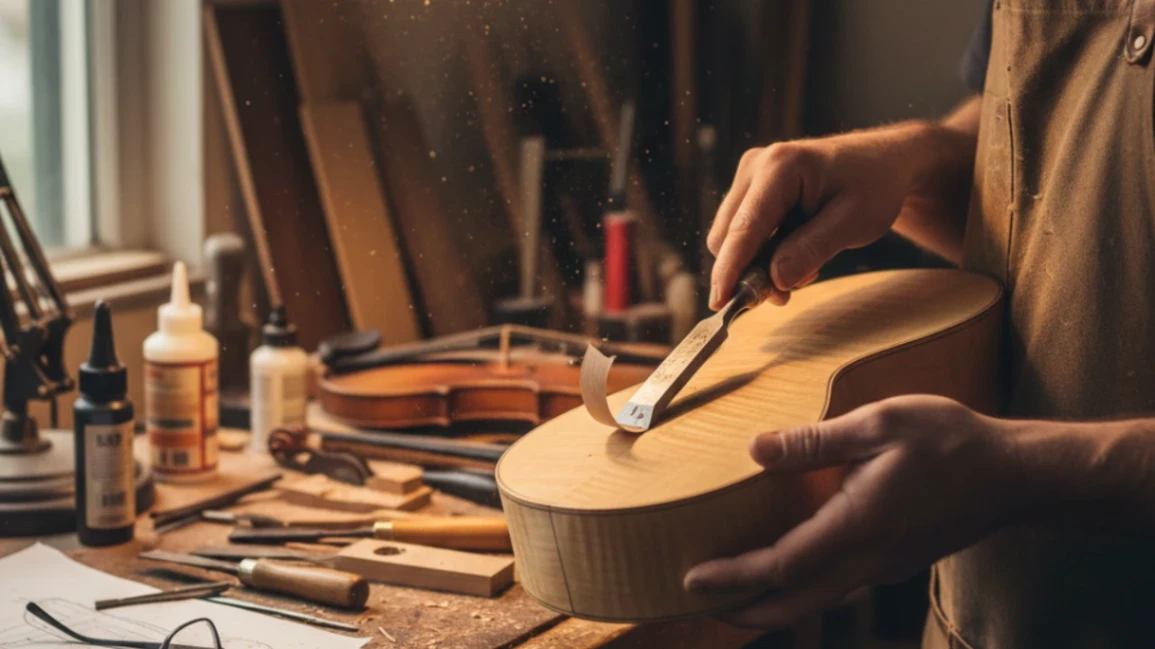
Carved rather than assembled: tops and backs are shaped from thick billets using planes, gouges, and scrapers until they reach a specific tap tone. There are no patterns for thickness — each plate is tuned to itself. Violin making in particular is a deep and long-established tradition with formal training through American and European schools (Violin Making School of America, Newark School of Violin Making). Archtop guitar building follows the tradition of D'Angelico and D'Aquisto, blending jazz aesthetics with classical carving discipline. Both require significant hand-skill development before a first instrument is attempted.
Start with an acoustic guitar kit or a ukulele scratch build before committing to any other instrument family. Both force you to bend wood, fit a neck, cut a nut, slot a fretboard, and install a bridge — the five operations that recur in almost every stringed instrument build. Mastering the sequence on a forgiving instrument makes every subsequent project faster and more intentional.
The Builder's Progression
Assembly: learning the sequence
Pre-shaped parts eliminate the need for a full tool kit while teaching the critical operations: gluing braces, fitting the neck, binding the body, slotting frets, cutting a nut, and applying a finish. A kit build reveals which stages you find satisfying and which feel outside your current capability. Most luthiers agree that completing one kit build is worth more than reading six books about the craft.
Construction: raw materials to finished instrument
Selecting and preparing raw tonewoods, bending sides, graduating a top, routing binding channels, and cutting a precise neck joint from scratch. Each operation is new and takes longer than expected. The first scratch build will have visible imperfections; the third will have fewer. Understanding why things go wrong — a back joint that opens, a nut slot filed too deep — develops faster than the ability to prevent them.
Craft: repeatable quality and intentional choices
Bracing is voiced by feel and tap tone, not just by template. Neck geometry is set to the player's specs rather than default measurements. Finishing becomes a controlled process rather than a series of repairs. You make deliberate wood selections — a tight-grained Sitka Spruce top for a brighter response, a more open-grained Engelmann Spruce for warmth — and can predict roughly how a completed instrument will sound before the first string is installed.
Design: instruments that play and sound your way
Body shapes are drawn and templated from scratch. Bracing patterns are modified or entirely original. Aesthetic choices — inlay work, binding combinations, headstock shapes — reflect a coherent point of view. At this stage, the constraint of acoustic physics has become a design language. Instruments leave the bench that no one else is making, built to the specifications of specific players or musical styles.
Tools and Materials You Will Need
Luthiery requires some specialised tools not found in general woodworking shops — radius dishes, fret files, nut slot gauges, and binding jigs — but the core tool kit is smaller than most beginners expect. The right approach is the same as general woodworking: buy to the project, not to an imagined future shop.
The non-negotiables — you need these before your first session. No upsell here, just what actually matters to get started safely.
Violin Maker's Vise
Fret Slotting Saw
Worth it once you're committed. These items meaningfully improve your experience and are often bought within the first few months.
Soundhole Rosette Saw
Interactive Buyer's Guide
Compare all tiers, track what you own, see your full budget.
Understanding Tonewoods
| SPECIES | ROLE | TONAL CHARACTER | NOTES |
|---|---|---|---|
| Sitka Spruce | Soundboard | Strong fundamental, clear separation, punchy attack. The industry standard for steel-string acoustic tops. | |
| Engelmann Spruce | Soundboard | Warmer, more complex overtones than Sitka. Lower stiffness; responds to lighter touch more readily. | |
| Western Red Cedar | Soundboard | Warm, immediate response with a darker, more complex tone. Less headroom for loud playing than spruce. | |
| Indian Rosewood | Back & Sides | Strong bass, clear highs, scooped midrange. Projects well. Arguably the most recognised acoustic guitar tone. | |
| Mahogany | Back & Sides | Warm, midrange-forward, punchy. Less separation than rosewood but more direct and immediate. | |
| Maple | Back & Sides | Bright, clear, reflective tone with pronounced highs. Less warmth than rosewood or mahogany. | |
| Honduran Mahogany / Sapele | Neck | Acoustically neutral; neck wood contributes less to tone than body wood but must be dimensionally stable. | |
| Ebony | Fretboard | Dense surface enhances note definition and sustain. The preferred fretboard material for classical and high-end steel-string guitars. | |
| Indian Rosewood | Fretboard | Warm, slightly porous surface. The standard fretboard material for most production steel-string guitars. |
Tonewood selection is one of the most discussed and most misunderstood topics in luthiery. The species matters, but within a species, grain runout, stiffness-to-weight ratio, and medullary ray patterns matter more. A piece of ordinary Engelmann Spruce with perfectly vertical grain and high stiffness will outperform a piece of premium Adirondack Spruce with wild runout on almost every acoustic measure. Learn to read the wood before the label.
| Species | Role | Tonal character | Notes |
|---|---|---|---|
| Sitka Spruce | Soundboard | Strong fundamental, clear separation, punchy attack. The industry standard for steel-string acoustic tops. | Widely available and relatively affordable. High stiffness-to-weight ratio. Excellent for strummers and heavy pickers. The safest default for a first build. |
| Engelmann Spruce | Soundboard | Warmer, more complex overtones than Sitka. Lower stiffness; responds to lighter touch more readily. | Often preferred for fingerstyle instruments. Softer surface dents more easily. Requires lighter bracing than Sitka to open up properly. |
| Western Red Cedar | Soundboard | Warm, immediate response with a darker, more complex tone. Less headroom for loud playing than spruce. | The standard top wood for classical guitars. Also excellent for fingerstyle steel-string work. Softer than spruce; susceptible to denting and cracking if braced too heavily. |
| Indian Rosewood | Back & Sides | Strong bass, clear highs, scooped midrange. Projects well. Arguably the most recognised acoustic guitar tone. | Dense and heavy. CITES-regulated; requires documentation for international sales. Oily surface needs careful preparation before binding glue-up. Widely available from tonewood suppliers. |
| Mahogany | Back & Sides | Warm, midrange-forward, punchy. Less separation than rosewood but more direct and immediate. | The classic back and sides wood for smaller-bodied guitars (000, OM) and all-mahogany builds. Easier to work than rosewood. Also widely used for necks due to stability and machinability. |
| Maple | Back & Sides | Bright, clear, reflective tone with pronounced highs. Less warmth than rosewood or mahogany. | Traditional for archtop guitars and mandolins. Produces a focused, sustaining tone suited to ensemble playing. Figured maple (flamed, quilted, birdseye) is prized for aesthetics as well as tone. |
| Honduran Mahogany / Sapele | Neck | Acoustically neutral; neck wood contributes less to tone than body wood but must be dimensionally stable. | Mahogany is the standard neck wood for most acoustic and electric builds. Sapele is a common, stable substitute. Quarter-sawn stock is essential for neck stability; flatsawn necks move with humidity changes. |
| Ebony | Fretboard | Dense surface enhances note definition and sustain. The preferred fretboard material for classical and high-end steel-string guitars. | Increasingly expensive and CITES-regulated. Macassar ebony is a more available alternative. Requires sharp tools and dust protection — fine ebony dust is a respiratory irritant. |
| Indian Rosewood | Fretboard | Warm, slightly porous surface. The standard fretboard material for most production steel-string guitars. | More workable than ebony for beginners. Does not require finishing — the natural oils provide adequate protection. Slotting and fretting is more forgiving than on harder, denser boards. |
Craft Techniques That Actually Matter
Graduate the top by tap tone, not just by measurement
A soundboard is typically graduated to 2.5–3.5mm thickness, but the target is a specific stiffness and flex behaviour, not a number on a calliper. Hold the plate by its centre, tap the bass side, and listen to the pitch and sustain of the tap tone. As you thin the plate, the pitch drops and the sustain lengthens. The target sound varies by species and builder preference — this is the acoustic intuition that develops with practice and cannot be fully taught from a book. Irving Sloane's Guitar Repair and Gore and Gilet's Contemporary Acoustic Guitar Design and Build both provide useful reference tap tones as starting points.
Brace to the plate, not to a plan
Scalloping braces — reducing their height toward their ends to taper the stiffness they contribute — must be calibrated to the specific plate you are working with. A pre-printed plan gives a brace profile; your plate gives you feedback. Flex the top across the grain with the brace glued, feel how stiff it is relative to the unstiffened plate, and adjust. Two builders working from identical plans with different spruce tops should end up with differently scalloped braces if they are working correctly.
Fit the neck before you finish the body
Setting the neck angle on an acoustic guitar requires access to the dovetail mortise and the ability to adjust the heel geometry by fractions of a millimetre. This is almost impossible once the body is finished. Dry-fit the neck repeatedly — checking with a straight edge laid across the frets to the bridge — and make corrections before gluing. The standard spec is a straight edge clearing the top at the bridge location by the thickness of the saddle, minus action clearance. Getting this right in the white, before a drop of finish has been applied, saves enormously more work than correcting it afterward.
Apply finish in many thin coats, not few thick ones
Thick coats of lacquer take longer to cure and are prone to runs, crazing, and the dampening of acoustic response. Thin coats — light enough to flash off in under 10 minutes — build a level surface controllably and cure properly between applications. Nitrocellulose lacquer, the traditional choice, is applied in 8–15 coats with gentle scuff-sanding between coats. The final polishing involves level-sanding with 400 through 2000 grit followed by buffing compound. Waterborne finishes are more forgiving and environmentally friendlier; they do not have the decades of post-cure off-gassing that nitro proponents cite as a tone benefit.
File the nut last and work slowly downward
The nut is the final determinant of action at the first fret, and a nut filed too low produces fret buzz that cannot be corrected without cutting a new nut. Use dedicated nut files matching your string gauges exactly and file each slot in small increments, testing after every few strokes. The correct depth leaves each string sitting just above the first fret — close enough to touch when the string is fretted at the third fret, but not resting on it. Bone is the standard nut material for acoustic instruments; TUSQ (synthetic ivory) is an excellent, more consistent alternative for beginners.
Set up the completed instrument before declaring it finished
A completed build is not finished until it plays properly. Full setup — adjusting truss rod relief to 0.3–0.5mm at the seventh fret, setting nut action, adjusting saddle height to target fret clearance at the twelfth fret, and setting intonation — is the final stage of building, not an afterthought. Most luthiers find that a mediocre build set up properly plays better than a beautiful build with a high, uncorrected action. Learn to do a complete setup; it transforms the playing experience and teaches you to hear what the instrument is actually capable of.
Common Questions Answered
- Do you need woodworking experience before attempting luthiery?
Not necessarily, but basic comfort with hand tools accelerates the early stages enormously. If you have never used a chisel, plane, or saw before, spend a few weeks on a simple woodworking project — a small box, a shelf — before starting an instrument build. The tolerance demands of luthiery are higher than general woodworking, but the tool vocabulary is largely the same. Many successful luthiers came from general woodworking; many others came directly from an interest in instruments with no prior craft experience. Both routes work.
- How much does it cost to build a guitar from scratch?
A first scratch-build acoustic guitar in straightforward tonewoods (Sitka Spruce top, Indian Rosewood back and sides, Mahogany neck) typically costs $300–$600 in materials, not including tools. Kit builds run $150–$350 depending on quality level and supplier. Premium tonewoods (highly figured maple, Adirondack Spruce, Brazilian Rosewood where legally sourced) can push materials costs considerably higher, but the baseline is more accessible than most beginners expect. Tool investment is a separate and larger initial cost — see the gear section above.
- How long does it take to build a guitar?
A kit build typically takes 40–80 hours spread over several weeks — longer when glue-ups and finish coats require drying time between sessions. A scratch build from raw tonewoods typically takes 100–200 hours for a first attempt, with significant time absorbed by learning each new operation. Experienced luthiers building a single acoustic guitar can produce a finished instrument in 60–100 hours. Building in a class or workshop compresses this significantly because setup, clamping systems, and tool decisions are pre-made.
- Kit build or scratch build: which is better for a beginner?
Kit build first, then scratch build. A kit eliminates the operations most likely to produce unusable results on a first attempt — side bending, top graduation, back joint preparation — and replaces them with fit-and-glue steps that teach the assembly logic of an instrument. Scratch builds are dramatically more satisfying and educational, but attempting one without the assembly experience that a kit provides is genuinely likely to result in a scrap pile rather than a playable instrument. The kit is not a lesser path; it is the faster route to a scratch build that succeeds.
- Where is the best place to learn luthiery beyond books?
The Musical Instrument Makers Forum (MIMF) and the Acoustic Guitar Forum (AGF) both have large, active communities covering every aspect of building and repair. Stewart-MacDonald's YouTube channel contains extensive free instructional video. For structured learning, short courses at dedicated schools — Roberto-Venn School of Luthiery, Galloup School of Guitar Building, and various community college programs — provide hands-on instruction with professional tooling already in place. A week-long intensive course often achieves more than six months of self-directed shop time, particularly for operations like side bending and neck setting that benefit from immediate expert feedback.
- Is luthiery a craft you can eventually sell instruments from?
Yes, though the path from hobbyist to paid maker is long. Most independent luthiers who sell instruments full-time spent 5–10 years building as a hobby first. The market for hand-built instruments is real but small and price-sensitive — a buyer willing to spend $3,000 on a custom acoustic has many established makers to choose from and will expect a standard of work that takes years to reach consistently. The more realistic near-term income opportunity is repair work: setups, refrets, nut replacements, and crack repairs that draw on the same skills as building but produce immediate, compensated results.