Best 3D Printer for Prop Making (2026): Build Volume Decides How Many Seams
A helmet does not fit on any hobby printer, so props get sliced into pieces, printed, and glued back together. Every seam is then filled, sanded and primed by hand, which is where the hours actually go. Build volume is not about printing bigger things in one piece, it is about how many seams you have to hide.
HobbyStack may earn a commission from links on this page at no extra cost to you. Our picks are chosen on merit; the commission helps fund the research.
- Bigger build volume means fewer parts, fewer seams, and much less sanding.
- PLA is fine for props. It prints easily and it is not going in a hot car.
- Enclosed printers matter for ABS and ASA, and for keeping fumes contained.
- Auto bed levelling is not a luxury. It removes the commonest failure.
- Budget for filler, primer and sandpaper. Printing is the fast half.
 Creality Ender 3 V3 SELearning cheaply$199Check price
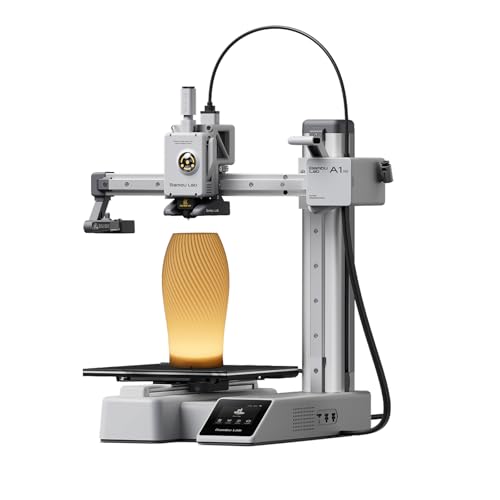 Our pickBambu Lab A1 miniMost prop makers$249Check price
 Bambu Lab P1SBig parts and ABS$399Check price
Build volume and the seam problem
A full-size helmet is roughly 300mm across. No printer here can do that in one piece, so the model gets cut into parts in software, printed separately, and assembled.
Each cut becomes a seam, and each seam needs gluing, filling, sanding, priming and checking under raking light. That work scales with the number of seams, not with the size of the print. A helmet in four parts is a different weekend from a helmet in nine.
So build volume matters more here than in most printing:
- 180mm (A1 mini) — a helmet in six to eight parts, most props in several
- 220mm (Ender 3 V3 SE) — noticeably fewer cuts
- 256mm (P1S) — many props in two or three parts, some pauldrons in one
Orientation matters too. Printing a part upright rather than flat can put a seam somewhere invisible, and slicers let you cut along a panel line the design already has, which hides the join in something the eye expects.
Print speed is less important than it looks. A prop print runs overnight either way, and the finishing takes longer than the printing on almost every project.
Layer height is a finishing decision. Fine layers look better raw and still need sanding; coarse layers print faster and need more filler. Most prop makers print coarse and fill.
Materials, enclosures and what actually goes wrong
PLA is the right default for props. It prints at low temperature, sticks to the bed, barely warps, sands well and takes filler and primer happily. It softens in a hot car, which matters for a prop only if you leave it in one.
PETG is tougher and slightly flexible, good for parts that take stress like straps and clips. It is stringier to print and less pleasant to sand.
ABS and ASA are the ones that need an enclosure. They warp badly in a draught and they release fumes you should not be breathing, so an enclosed printer is both a quality and a ventilation matter. This is the main reason to choose the P1S over the A1 mini.
Then the failure modes. Almost every failed print traces to the first layer, which is why automatic bed levelling is the feature that matters most. All three here have it, and it removes the single most common reason beginners give up.
Warping lifts corners off the bed on large flat parts. A brim in the slicer fixes most of it.
Supports hold up overhangs and leave marks where they touch. Orienting a part to need fewer supports is worth more than any setting, because support scars are extra sanding.
Stringing leaves wisps between parts. Usually a temperature or retraction issue, and it is trivial to clean up on props with a heat gun.
 Best for learning cheaply
Creality Ender 3 V3 SE 3D Printer
The cheapest way into printing that is not a false economy, and the specification is genuinely reasonable: CR Touch automatic bed levelling, a Sprite direct extruder that handles flexible filament, dual Z axis for a stable gantry, and automatic filament loading. The build volume is about 220mm cubed, which is actually larger than the A1 mini. It is an open frame, so no ABS, and it needs more tinkering than a Bambu.
What's good
- CR Touch auto levelling removes the main failure
- About 220mm cubed, larger than the A1 mini
- Direct extruder handles flexible filaments
- Cheapest genuinely capable printer here
What's not
- Open frame rules out ABS and ASA
- Needs more tuning and tinkering than a Bambu
- Noisier and slower in practice
- Software is less polished
 Best for most prop makers
Bambu Lab A1 mini 3D Printer + LED Lamp Kit
Ready to use out of the box, which is the actual reason to pick it: you spend the first evening printing rather than levelling and calibrating. Bambu's software handles the fiddly parts and the failure rate is dramatically lower than an open-frame kit, which matters when a prop part is a twelve-hour print. The build volume is the smallest here at about 180mm, so expect to cut helmets into more pieces and sand more seams.
What's good
- Genuinely ready to use with no assembly faff
- Much lower failure rate on long prop prints
- Excellent slicer and model ecosystem
- Quiet enough to run overnight indoors
What's not
- Smallest build volume here, so more seams
- Open frame, so no ABS or ASA
- Proprietary ecosystem pulls you toward Bambu parts
- Dearer than the Ender for less volume
 Best for big parts and ABS
Bambu Lab P1S 3D Printer, Ready-to-Use FDM 3D Printer
Enclosed and about 256mm cubed, and both of those matter specifically for props. The volume cuts a helmet into two or three parts instead of six to eight, which removes hours of seam filling from every build. The enclosure keeps the heat in so ABS and ASA print without warping, and keeps the fumes contained, which is a genuine ventilation point rather than a nicety. It is a real step up in cost.
What's good
- 256mm volume means far fewer seams to hide
- Enclosure lets you print ABS and ASA properly
- Contains fumes as well as heat
- Same low-fuss Bambu workflow as the A1 mini
What's not
- Over 1.5 times the A1 mini
- Takes up considerably more desk space
- Enclosure makes it warm in a small room
- Still not big enough for a helmet in one piece
A helmet prints over a couple of nights and then takes a fortnight of evenings to finish. Gluing, filling layer lines, sanding through grits, priming, finding the flaws the primer reveals, and sanding again is the actual work, and no printer shortens it much. Budget for filler primer, a range of wet and dry paper, and superglue with an accelerator from the start, because running out mid-build stalls everything.
Finishing a printed prop
Glue with cyanoacrylate and accelerator. Superglue plus a spray activator sets in seconds and lets you hold parts in alignment by hand rather than clamping awkward curves.
Fill with a body filler or filler primer. Layer lines are shallow, so several coats of filler primer sanded back removes most of them. Deeper seams want an actual putty first.
Sand through grits and do not skip. 120 to knock down seams, then 220, then 400. Skipping a grit leaves scratches the next grit cannot remove, and primer shows every one of them.
Prime, inspect, repeat. Grey primer under raking light is how you find flaws you cannot see on bare plastic. Expect to find some every time, fill, and prime again.
Heat can help. A heat gun softens PLA enough to correct a slightly warped part, and it cleans up stringing instantly.
Print a test piece first. A small section of the model tells you whether the scale, the fit and the layer height are right before you commit twelve hours to a part.
Before you buy
Build volume matters most, because it decides how many seams you sand.
Auto bed levelling is essential, not optional.
Enclosed only if you actually intend to print ABS or ASA.
PLA covers almost all prop work. Do not overthink materials.
Budget for filler primer and sandpaper alongside the printer.
3D printing for props questions
Can I print a helmet in one piece?
What filament should I use for props?
Do I need an enclosed printer?
Why do my prints keep failing?
The Bambu Lab A1 mini is the one to buy for most prop makers, because a printer that just works is worth more than specifications when a part is a twelve-hour print. Take the Ender 3 V3 SE if money is tight and you do not mind tinkering, and note it actually has more build volume. Step up to the P1S if you want fewer seams on large parts or genuinely need ABS. Then buy sandpaper.
Ready to actually do it?
The first prop & replica fabrication quest takes an evening, and it tells you whether the gear was worth it better than any review can.
Start Prop & Replica FabricationThe HobbyStack editorial team researches each guide against manufacturer specifications, published resources and practitioner sources. Every product is checked for availability and described against its current listing before publication, and prices are re-checked when guides are updated.
About our editorial process →More gear guides
All guides
Best Rotary Tool and Flex Shaft (2026): Control Beats Power
Holding a rotary tool is like carving with a brick: the motor, the weight and the vibration are all in your hand, and precision suffers for it. A flex shaft moves the motor away and leaves you holding something the size of a fat pen. For detail work it is not an upgrade, it is a different tool.

Best Beginner Digital Piano (2026): 3 Picks for Every Budget
If you want to actually learn piano, not just play with sounds, the keys matter more than anything else. You want 88 of them, and you want them weighted so your fingers build real technique that transfers to an acoustic. Here are three that do it right, from an affordable starter to a piano you can play for years.

Best Acoustic Guitar Strings for Beginners: Gauge, Coating, and Tone
Fresh strings transform how a guitar sounds and feels: and beginners often play far too long on old, dead ones. Light-gauge strings are easier on new fingers, and coated strings last longer. Here is what to put on your acoustic, how we chose, and what to expect.

Best Beginner Acoustic Guitar 2026: Yamaha FG800 vs Fender CD-60S vs Taylor GS Mini
The first acoustic guitar makes or breaks whether you stick with the instrument. Spend $80 and you'll quit in 6 months. Spend $230 and you'll be playing in 5 years. Here are the three acoustics worth buying as a beginner.

Best Beginner Electric Guitars: The Yamaha Pacifica and Its Rivals
A good beginner electric is easy to play, stays in tune, and is versatile enough for any style, and you do not need to spend much to get one. The Yamaha Pacifica is the runaway favourite. Here are three, how we chose them, and what to expect.

Best Beginner Guitar Amps: From Practice Amp to Modeling Powerhouse
An electric guitar needs an amp to make a sound, but the right beginner amp does far more than get loud. Modern modeling amps pack dozens of tones and effects into a small box. Here are three worth plugging into, how we chose them, and what to expect.