Best Millinery Wire (2026): Gauge Decides Whether the Brim Holds Its Line
Wire gauge runs backwards, so an 18 gauge wire is thicker than a 20. That catches people out in exactly the wrong direction: they buy a high number expecting something substantial, wire a brim with it, and watch the brim sag the first time the hat is picked up.
HobbyStack may earn a commission from links on this page at no extra cost to you. Our picks are chosen on merit; the commission helps fund the research.
- Lower gauge number means thicker wire. 18 is sturdier than 20.
- Brim edges want 18 to 19 gauge. Flowers and detail want 22 and up.
- Covered wire, always. Thread grips the covering and bare wire rusts into fabric.
- Join by overlapping several centimetres and binding, not by butting the ends.
- Wire the edge, then cover the wire with bias tape or petersham.
 18 gauge paper coveredBrim edges$7Check price
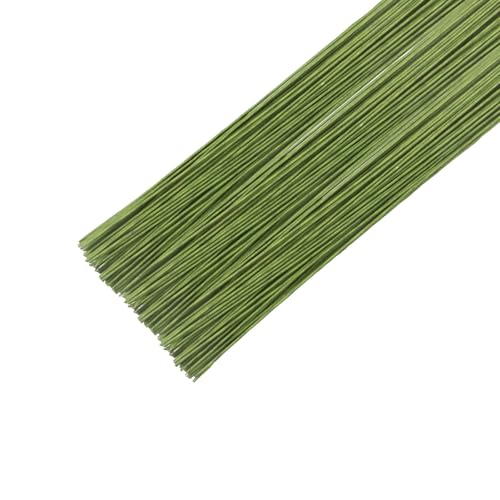 Our pick20 gauge cotton coveredMost work$8Check price
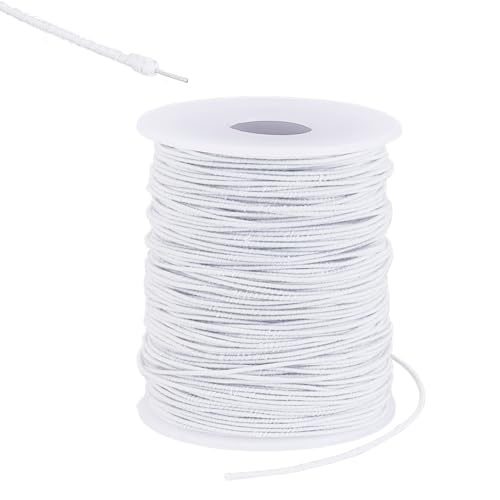 19 gauge, 100 yardsWorking through it$18Check price
Gauge, and what each weight is for
The gauge number is inverse to thickness. It originated as the number of drawing operations needed to reduce the wire, so more passes means thinner wire and a higher number. 18 gauge is thicker and stiffer than 20, which is thicker than 22.
For millinery, roughly:
- 18 to 19 gauge — brim edges on a hat that must hold its shape, structural work, large sculptural forms
- 20 to 21 gauge — general purpose. Most brim wiring on small and medium hats, headband frames
- 22 to 24 gauge — flowers, trims, delicate detail, binding other wires together
The failure modes are both real. Too thin and the brim droops under its own weight or deforms the first time the hat is handled, and once a wire has taken a kink it keeps it. Too thick and you cannot form a tight curve, you cannot sew through the covering easily, and the wire shows as a hard ridge under the fabric.
A hat is often wired with more than one gauge. A heavier wire at the outer brim edge for structure, a lighter one where a shape needs coaxing rather than holding.
Covered versus bare matters, and not for looks. Millinery wire is wrapped in paper or cotton thread, and that covering does two jobs: it gives your stitches something to grip, so the wire stays where you sewed it rather than sliding inside its channel, and it keeps bare metal off fabric, because steel wire against damp fabric rusts and the stain comes through to the outside.
Paper covered is cheaper and the covering can shred if you work it hard. Cotton covered is tougher and takes a stitch better.
Joining a wire, and wiring a brim
Never butt two ends together. A butt join has no strength, the ends work loose, and a cut wire end will eventually push through the covering fabric and out of the hat, which is as unpleasant as it sounds.
Overlap and bind. Lay the two ends alongside each other for three to five centimetres and bind them tightly together with a finer wire, around 24 gauge, or with strong thread. The overlap carries the load; the binding holds it closed.
Position the join away from the front. Even a good join is a slightly thicker section, so put it at the back or over a side where the eye does not land.
Then wiring a brim, which is the core operation:
Form the wire to the finished shape first, as a closed loop with the join bound, before it goes anywhere near the hat. Trying to shape wire while sewing it to fabric fights you on both.
Sew it to the brim edge with a blanket or overcast stitch, catching the covering with each stitch so the wire cannot rotate or slide. This is where a milliners straw needle earns its keep, because you are passing through stiff material repeatedly.
Then cover the wire. A strip of bias-cut fabric or petersham ribbon over the wired edge hides it and gives a clean finish. An exposed wire edge is the mark of an unfinished hat.
Check the shape against a head before covering, because once the wire is bound in it is hard to adjust.
Mind your hands. Cut wire ends are sharp, and millinery wire is springy enough to flick. Cutters, not scissors, and file the ends.
 Best for brim edges
100 Pieces 18 Gauge Green Paper Covered Floral Wire Stems
A hundred 18 gauge paper-covered stems, which is the heaviest wire here and the right weight for a brim edge that has to hold its line when the hat is picked up. Supplied as cut stems rather than a continuous reel, so it suits structural work and flower stems rather than long continuous brim loops. Paper covering is cheaper than cotton and can shred if you work it hard or pull stitches tight through it.
What's good
- 18 gauge is stiff enough for structural brim work
- A hundred stems is a lot of wire for the money
- Covering gives stitches something to grip
- Pre-cut stems suit flowers and framing
What's not
- Cut stems, not a continuous reel
- Paper covering shreds under hard working
- Green colour shows through pale fabrics
- 18 gauge is too stiff for tight curves
 Best for most work
BENECREAT 21.8 Yards White Floral Wires
Twenty-one yards of 20 gauge cotton-covered wire on a reel, which is the general-purpose combination: stiff enough for most brim wiring and headband frames, flexible enough to form a tight curve without fighting you, and cotton covering that takes a stitch far better than paper and does not shred. A continuous reel is what you want for a brim, since you need one unbroken length to form the loop. White suits pale fabrics.
What's good
- 20 gauge handles most brim and frame work
- Cotton covering takes stitches without shredding
- Continuous reel suits forming a brim loop
- White works under pale fabrics
What's not
- Too light for a large structural brim
- 21 yards goes quickly on big hats
- White shows through very dark fabric
- One gauge, so you will want others
 Best for working through it
NBEADS 100 Yards Ghost White Floral Wires
A hundred yards of 19 gauge cotton-covered wire, which is both a slightly heavier gauge and roughly five times the length of the 20 gauge reel. Nineteen sits usefully between structural and general purpose, so it covers brim edges on medium hats and frames alike. The length is the real argument: wire is consumed faster than people expect once you are making hats rather than one hat, and running out mid-brim means a join you did not want.
What's good
- 100 yards, so you stop rationing it
- 19 gauge sits between structural and general use
- Cotton covered, so it stitches well
- Ghost white suits most pale fabrics
What's not
- Over twice the 20 gauge reel
- More wire than one or two hats needs
- Single gauge, like the others
- Large reel takes storage space
A butted join has no strength at all: the ends work loose with handling, and a cut wire end eventually pushes through the covering fabric and out of the finished hat. Overlap the two ends alongside each other for three to five centimetres and bind them tightly with fine 24 gauge wire or strong thread, so the overlap carries the load. Put the join at the back, where a slightly thicker section will not be noticed.
The rest of the structure
Petersham ribbon is the inner headband. Unlike grosgrain it can be shaped with an iron to curve around a head, which is why milliners use it and dressmakers do not. Sewn in by hand.
Buckram or sinamay gives the body. Wire provides the edge and the structure; the stiffened fabric provides the surface. Blocked over a hat block and left to dry.
Wire the edge before covering, every time. Trying to add a wire after the covering is on means stitching blind.
Keep a reel of fine binding wire. Twenty-four gauge for joining, binding and attaching trims is a different job from brim wire and you want both.
Use wire cutters, not scissors. Millinery wire ruins fabric scissors instantly and leaves a crushed end that is harder to bind.
File or fold cut ends. A filed end is kinder to the covering fabric and to you.
Store reels flat and dry. Humidity gets into paper covering and the wire beneath will rust through it over a season.
Test the shape on a head before anything is covered. Wire is easy to adjust before it is sewn and stitched over, and very hard afterwards.
Before you buy
Remember lower gauge means thicker. 18 is sturdier than 20.
18 to 19 for brim edges, 20 to 21 general, 22 and up for trims.
Cotton covering takes stitches better than paper.
Buy a reel rather than cut stems for brim work.
Get fine 24 gauge binding wire as well, for joins.
Millinery wire questions
Does a higher gauge mean thicker wire?
What gauge should I use for a hat brim?
Why does millinery wire need to be covered?
How do I join two ends of wire?
The 20 gauge cotton-covered reel is the one to start with: stiff enough for most brim and frame work, flexible enough to curve, and cotton covering that takes a stitch properly. Add the 18 gauge stems for structural brims and flower stems. The 100-yard 19 gauge reel is the one to buy once you are making hats rather than a hat. And remember the numbers run backwards.
Ready to actually do it?
The first millinery quest takes an evening, and it tells you whether the gear was worth it better than any review can.
Start MillineryThe HobbyStack editorial team researches each guide against manufacturer specifications, published resources and practitioner sources. Every product is checked for availability and described against its current listing before publication, and prices are re-checked when guides are updated.
About our editorial process →More gear guides
All guides
Best Millinery Needles (2026): The Eye Is No Wider Than the Shaft
A millinery needle, also sold as a straw needle, has an eye no wider than its shaft. That sounds like a trivial detail and it is the entire reason the needle exists: the whole length passes through stiff buckram, felt and sinamay at a constant diameter, so nothing catches halfway and nothing leaves a hole bigger than the thread.
Best Beginner Sewing Machine 2026: Brother vs Janome vs Singer
The first sewing machine is the difference between sewing as a satisfying hobby and sewing as the thing you tried for a month. Here's how to pick a beginner machine that actually works, plus the brands and models to skip.

Best Fabric Marking Tools (2026): Marks That Come Out Again
Every marking tool is a trade between two failure modes: a mark that disappears before you have sewn it, and a mark that will not come out afterwards. There is no tool that avoids both on every fabric, which is why experienced sewers own several and always test on a scrap first. The one that ruins a garment is usually the one nobody tested.

Best Fabric Shears for Beginners (2026): 3 Real Picks
There is one rule that matters more than which shears you buy: they never touch paper. Paper dulls a fabric blade fast, and a dull blade stops cutting cloth and starts pushing it, so your line wanders and the edge frays. That single habit separates shears that stay sharp for years from a pair that feels cheap within a month, and it is why sewers guard their fabric scissors and label them. Beyond that, the choices are simple: length, weight, and whether the handle suits your hand. Here are three good pairs and who each is actually for.

Best Seam Ripper (2026): The Tool That Saves the Garment
Unpicking is not a sign of failure; it is most of sewing. Every fitted garment involves stitching something, trying it, and taking it apart again, and the tool that does that badly will put a hole in fabric you have already cut and cannot replace. A seam ripper is two pounds of insurance on a project worth considerably more.

Best Sewing Machine Needles (2026): The Cheapest Fix for Bad Stitching
Skipped stitches, puckering, snapping thread and a machine that suddenly sounds wrong are almost always the needle, and almost never the machine. Needles are consumable — they blunt, bend a fraction and develop burrs long before they look damaged — and most people sewing badly are sewing with a needle that should have been binned months ago.