Best Calligraphy Pen Holders (2026): Straight, Oblique and Why It Matters
The holder is the cheapest part of dip-pen calligraphy and the one that decides whether the script you want is even possible. A straight holder is fine for most hands and most styles. Copperplate and Spencerian, with their steep slant, are very hard to write with one — and that is the whole reason the strange-looking oblique holder exists.
HobbyStack may earn a commission from links on this page at no extra cost to you. Our picks are chosen on merit; the commission helps fund the research.
- Straight holders suit broad-edge scripts and most upright hands. Start here unless you want Copperplate.
- Oblique holders angle the nib sideways so a steep slant is reachable without twisting your wrist.
- The flange on an oblique must be adjusted to your nib. Out of the box it is rarely right.
- Seat the nib firmly but not to the hilt — nibs are meant to be replaced.
- A holder costs a few pounds. Buy both kinds before deciding which suits you.
 CHUANGRONG Dip Pen Holder (2 pack)Trying oblique cheaply$10Check price
 Our pickSpeedball 2-in-1 PenholderMost beginners$14Check price
 Manuscript Modern Calligraphy Oblique SetCopperplate from scratch$27Check price
Why oblique holders exist
Pointed-pen scripts like Copperplate and Spencerian are written at a steep slant — often around 55 degrees from the horizontal. The nib has to travel along that slant with its tines square to the stroke, or the thick-and-thin contrast that defines the script does not happen and the nib catches the paper.
With a straight holder, reaching that angle means rotating your wrist into an awkward and unsustainable position, or turning the paper so far that you cannot see what you are writing.
An oblique holder solves it mechanically: a small arm, the flange, holds the nib off to one side at an angle, so your hand sits naturally while the nib meets the paper correctly.
For broad-edge scripts — Italic, Gothic, Uncial — none of this applies. Those are written with a chisel-edged nib held at a consistent angle, and a straight holder is the correct tool.
So the question is not which holder is better. It is which script you want to write.
Fitting the nib, and adjusting the flange
Two small mechanical points that trip up nearly every beginner.
Seating the nib. Push it into the holder firmly enough that it does not wobble, but do not force it all the way in — nibs are consumable and you will want to remove this one. On a straight holder with a universal insert, the nib goes between the metal leaves and the inner barrel, not down the middle.
Adjusting the flange on an oblique. Out of the packet the flange is set for some generic nib, and the correct position depends on the nib you use. Held over the paper as you write, the nib's tip should sit roughly in line with the centre of the holder's shaft, with the tines flat to the paper. Bend the flange gently until that is true.
Skipping that adjustment is the reason people conclude an oblique holder does not work for them. An unadjusted flange puts the nib on one tine, which catches, splatters and feels dreadful.
 Cheapest way to try oblique
CHUANGRONG-US Dip Pen Holder
Two oblique holders for the price of a coffee, which makes this the sensible way to find out whether pointed-pen calligraphy suits you before spending anything real. The flange is adjustable, so with a few minutes of careful bending you can set it correctly for your nib — and doing that on a cheap holder is far less nerve-wracking than on an expensive one. Two in a pack means you can keep two different nibs mounted. The build is plain plastic: it is light, which some people find makes the pen harder to control, and the finish is basic. Nothing here stops you writing well; it simply is not a pen you will enjoy holding for hours.
What's good
- Two holders for very little
- Adjustable flange, so it can be set correctly
- Keep two nibs mounted at once
- Low-risk way to try oblique
What's not
- Light plastic — less controlled feel
- Basic finish
- Flange needs adjusting before first use
- Not comfortable for long sessions
 Best for most beginners
Speedball 2-In-1 Penholder
A holder that takes a nib straight or in an oblique position, which resolves the question this whole guide is about without making you choose first. That matters more than it sounds: most beginners do not yet know whether they want broad-edge Italic or pointed-pen Copperplate, and buying one holder that does both means the answer can come from trying rather than from guessing. Well made, with a comfortable barrel that suits longer sessions than the cheap plastic holders. The compromise is that a dedicated oblique holder gives a slightly better-judged flange position, so serious Copperplate work eventually wants a purpose-built one. As a first and possibly only holder, this is the right buy.
What's good
- Straight and oblique in one holder
- Removes the need to choose upfront
- Comfortable for long sessions
- Solid, well-finished build
What's not
- Dedicated obliques have a better flange geometry
- Heavier than plastic holders
- Only one nib mounted at a time
- Dearer than a basic holder
 Best for starting Copperplate
MANUSCRIPT Modern Calligraphy Oblique Pen Set
An oblique holder supplied with three nibs, which is the sensible package if you already know pointed-pen script is what you want. The nibs matter as much as the holder: different pointed nibs vary enormously in flexibility, and having three means you can find out whether you prefer a soft nib with dramatic line variation or a firmer one that is easier to control, without buying separately and guessing. The holder itself is properly finished and comfortable. It is the most expensive here and it is single-purpose — no straight option — so it is the wrong buy if you have not decided you want Copperplate or Spencerian. Adjust the flange to whichever nib you settle on.
What's good
- Three nibs to find your preferred flex
- Purpose-built oblique geometry
- Comfortable, well finished
- Complete package for pointed pen
What's not
- Oblique only — no straight option
- Wrong buy if undecided on script
- Most expensive here
- Flange still needs adjusting per nib
A new oblique holder is set for a generic nib, not yours. If the pen catches the paper, splatters, or writes on one tine, bend the flange gently until the nib tip lines up with the centre of the shaft and both tines sit flat. Almost every "I cannot use an oblique" is an unadjusted flange rather than a lack of skill.
Preparing a new nib
New nibs come coated in a thin lacquer or oil to stop them rusting in the packet, and ink will bead and slide off it rather than flowing. A brand new nib that refuses to write is almost always this, not a fault.
Remove it before first use. The traditional methods: push the nib gently into a potato for a minute, wipe it with toothpaste and rinse, or pass it very briefly through a flame — briefly being the important word, since heat ruins the temper of the steel.
After each session, wipe the nib clean and dry. Ink left to dry on a nib corrodes it, and pointed nibs are fine enough that a little corrosion ruins the tip.
Nibs are consumables. Expect to replace them, and do not treat a worn one as a personal failure.
Before you buy
Decide the script first. Broad-edge wants straight; Copperplate wants oblique.
Undecided? A 2-in-1 holder means you do not have to guess.
Adjust the flange to your nib before writing a word.
Clean the manufacturing coating off a new nib or ink will not flow.
Holders are cheap. Owning both kinds costs less than one bad guess.
Pen holder questions
Do I need an oblique pen holder?
Why does my new nib not write?
How do I adjust an oblique flange?
How far should the nib go into the holder?
Pick the holder your script needs. If you want Italic or Gothic, a straight holder is correct and an oblique buys you nothing. If you want Copperplate, you want an oblique. The Speedball 2-in-1 is the sensible buy for anyone still deciding, because it does both properly. The Manuscript set is the right package if pointed pen is already the goal. Whatever you buy, adjust the flange and clean the coating off the nib before writing a word.
Ready to actually do it?
The first calligraphy quest takes an evening, and it tells you whether the gear was worth it better than any review can.
Start CalligraphyThe HobbyStack editorial team researches each guide against manufacturer specifications, published resources and practitioner sources. Every product is checked for availability and described against its current listing before publication, and prices are re-checked when guides are updated.
About our editorial process →More gear guides
All guides
Best Calligraphy Starter Kits for Beginners: Dip Pens, Speedball, and the Pilot Parallel
The right starter kit makes the difference between smooth, satisfying letters and a frustrating mess of ink blots and scratchy strokes. Here are the three kits worth buying first, and why a cheap brush-pen bundle is not one of them.
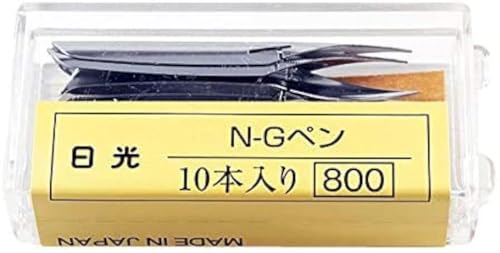
Best Dip Pen Nibs (2026): New Nibs Are Coated and Will Not Take Ink
A brand new nib dipped in ink will often refuse to write, and almost every beginner concludes they have bought a dud. Nibs ship with a thin oil or lacquer coating to stop them rusting in the packet, and ink beads off it. Until you remove that coating, nothing is going to work.

Best Beginner Acrylic Paint Set 2026: Liquitex BASICS and Where to Start
Acrylics are the best paint to start with: fast-drying, water-cleanup, and forgiving, but the cheapest craft-store paints are so thin and chalky they'll put you off. The fix is student-grade acrylics with real pigment, which cost barely more. Here are three sets, from the beginner standard to a pro-quality upgrade.

Best Canvas for Painting (2026): Cotton, Linen, and What Primed Really Means
Almost every cheap canvas says pre-primed, and almost every painter adds more primer anyway. Factory gesso is applied thinly to keep costs down, so paint sinks into the weave, colours dry dull and you use two or three times as much of an expensive tube as you needed to.

Best Easel for Beginners (2026): Tabletop, H-Frame or Neither
An easel is the piece of painting equipment people buy first and need last. Watercolour is usually painted flat or at a shallow angle; small acrylic and oil studies work fine propped against a stack of books. What an easel really buys you is the ability to stand back, see the whole picture at once, and work at a size your table cannot hold.

Best Graphite Pencils for Beginners (2026): 3 Picks
Graphite pencils come in a range of grades, from hard (H) that make light, thin lines to soft (B) that make dark, smudgy ones. For a beginner, the one spec that actually matters is getting a set that spans that range, roughly 2H to 8B, so you can shade properly instead of pressing harder on one pencil. Any of these three will do that.