Best Beginner Hiking Water Bottle 2026: Nalgene vs Hydro Flask vs CamelBak
Dehydration is the most common cause of early hike turnarounds and trail emergencies. The solution is simple: carry enough water and actually drink it. Here are three hydration options: the indestructible trail standard, the insulated bottle that keeps drinks cold all day, and the hands-free reservoir system for longer and hotter hikes.
HobbyStack may earn a commission from links on this page at no extra cost to you. Our picks are chosen on merit; the commission helps fund the research.
- Carry half a liter of water per hour of hiking in moderate conditions — more in heat or on strenuous climbs. A 32oz bottle (roughly 1 liter) is the minimum for a 2-hour hike. For full-day hikes, carry 2–3 liters.
- Our pick: Hydro Flask 32oz Wide Mouth (~$50). Insulated stainless steel keeps drinks cold for 24 hours. The bottle most day hikers carry on warm-weather trails.
- Classic: Nalgene Wide Mouth 32oz (~$16). The original trail bottle — virtually indestructible, dishwasher safe, and fits most pack side pockets. Not insulated, but reliable for decades.
- Long hikes: CamelBak Crux 3L Reservoir (~$45). Hands-free hydration system that clips inside your pack. 3 liters of capacity for all-day and multi-day hikes where frequent stops to drink aren't practical.
- Drink before you're thirsty. Thirst is a late indicator of dehydration — by the time you feel thirsty, your performance is already impaired. Sip regularly throughout the hike.
 Nalgene Wide Mouth 32oz Tritan~$1632oz · Tritan plastic · dishwasher safeEvery hike, every bag
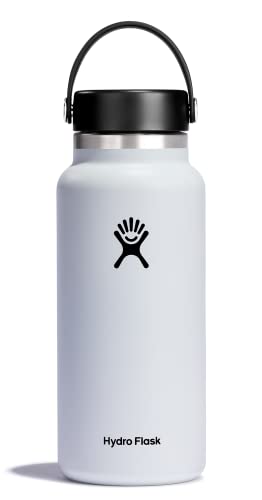 Hydro Flask Wide Mouth 32oz Flex CapPick~$5032oz · stainless steel · TempShield 24hr coldWarm weather day hiking
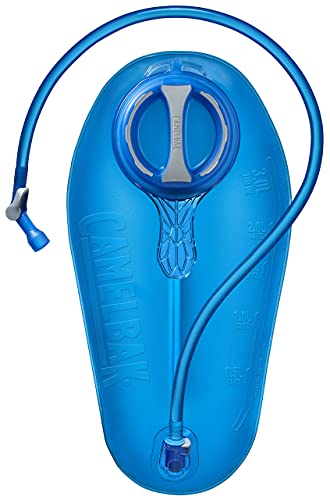 CamelBak Crux 3L Hydration Reservoir~$453L bladder · Crux bite valve · fits most packsFull-day and hot-weather hikes
How much water do you actually need?
The common guideline is half a liter per hour of moderate hiking — more in heat, high altitude, or on strenuous climbs. A 32oz Nalgene or Hydro Flask (just under 1 liter) is right for a 1–2 hour trail. A 3-liter reservoir is right for a 5–6 hour day hike in warm conditions. For a full-day hike, plan to carry at least 2 liters and know where water sources are (spring, stream, filter) if you need to refill.
The mistake most beginners make is carrying less than they need, not more. An empty water bottle at mile 6 of an 8-mile hike is a real problem. An unused liter at the trailhead costs you about 2 lbs of pack weight — an acceptable trade.
How we picked
We filtered on: capacity (32oz is the minimum for a half-day hike; 3L for a full day), insulation (stainless double-wall keeps drinks cold for hours; plastic does not), pack compatibility (standard 32oz bottles fit almost all pack side pockets; wide-mouth openings allow ice and cleaning), weight (stainless steel adds weight vs plastic — meaningful on longer trips), leak resistance (essential — a leaking bottle in your pack soaks your gear), and durability (Nalgene plastic and stainless steel both last decades; soft reservoir bladders require more care). All three picks have been the dominant choices in their category for years.
 Best classic trail bottle
Nalgene Wide Mouth 32oz Tritan
The Nalgene Wide Mouth is the bottle that's been in trail packs since the 1970s because it just works. Tritan plastic is BPA and BPS-free, dishwasher safe, drop-resistant at any temperature, and survives everything from desert heat to freezing temps. The wide-mouth opening takes ice, powdered drink mixes, and is easy to fill from streams if you're using a filter. The printed measurements on the side let you track exactly how much you've drunk. It's not insulated — water temperature matches ambient air temperature over a few hours — but most hikers who aren't in extreme heat find this fine. At $16, it's the bottle you put in every bag and never worry about.
What's good
- ~$16 — the lowest cost per trail-year of any bottle here
- Tritan plastic is virtually indestructible and dishwasher safe
- Wide mouth fits ice, drink mixes, and allows thorough cleaning
- Graduated measurements let you track intake
- BPA/BPS-free — safe for all liquids and temperatures
What's not
- Not insulated — drinks reach air temperature within a few hours
- Heavier than collapsible options (though lighter than stainless)
- Wide mouth lid requires full tilt to drink — no sipping while hiking
 Best for warm weather hiking
Hydro Flask Wide Mouth 32oz Flex Cap
The Hydro Flask 32oz Wide Mouth keeps drinks cold for 24 hours, which means ice water at the trailhead is still cold water 5 hours later at your turnaround point. On warm-weather hikes — anything above 70°F — this matters: warm water is less pleasant to drink and you end up drinking less of it, which compounds dehydration. The Flex Cap lets you pour one-handed without removing the lid (easier than a Nalgene when you're walking). The powder-coated exterior grips without slipping and doesn't condensate. Stainless steel construction means no plastic taste even after years of use. At 32oz it fits the side pockets of essentially every hiking pack.
What's good
- TempShield keeps drinks cold 24 hours — still cold at your turnaround point
- Flex Cap allows one-handed pour without removing lid
- No condensation on the exterior — stays dry in your bag
- Powder coat is grippy and doesn't chip with reasonable use
- Stainless steel: no plastic taste, dishwasher-safe lid
What's not
- $50 vs $16 for the Nalgene — 3x the price for insulation
- Heavier than the Nalgene due to stainless construction + double wall
- Dents if dropped hard — stainless doesn't bounce like Tritan
 Best for all-day hydration
CamelBak Crux 3L Hydration Reservoir
The CamelBak Crux reservoir eliminates the need to stop and open a bottle every time you want to drink. It holds 3 liters (6 standard water bottles) and rides inside your pack's hydration sleeve. The Crux bite valve delivers water on demand without removing it from your mouth between sips — you drink more, more often, without interrupting your pace. For hikes over 6 miles in warm weather, or any hike where you know you'll be working hard and sweating, a reservoir keeps you more consistently hydrated than a bottle system. The Crux Quick Link system lets you detach the hose for refilling without removing the bladder from your pack. Works with any pack that has a hydration sleeve (which includes most of the packs on our backpack guide).
What's good
- 3L capacity handles all-day hikes without refilling
- Hands-free drinking — sip without stopping or opening anything
- Crux bite valve flow rate: 66% more than older CamelBak models
- Quick Link disconnect for easy hose removal and cleaning
- Compatible with most hydration-ready hiking packs
What's not
- More complex to clean than a bottle — requires a brush kit (sold separately)
- No insulation — water warms up in the reservoir
- Adds weight to your pack vs an empty bottle (though the water weight is the same either way)
- Mold risk if stored wet — air dry fully between uses
Thirst is a lagging indicator — by the time you feel thirsty, you're already 1–2% dehydrated, which noticeably impairs endurance and decision-making. The practice: take 3–4 sips every 15–20 minutes regardless of thirst. Set a phone reminder if you're the type to forget. This one habit prevents the majority of trail dehydration problems.
Before you buy
Fill your water bottle completely at the trailhead even if you'll be near a stream — treatment takes time, and having water immediately is always safer than planning to filter.
Know the water sources on your route: map them using CalTopo or AllTrails before you go. In arid terrain, dry springs are common — don't assume a marked water source will have water.
If you're using a reservoir, freeze it overnight before a hot-weather hike. Frozen water in a 3L bladder stays cold for several hours and chills the entire pack contents.
Clean your hydration reservoir after every use — rinse with warm water, let it dry completely with the bladder open. Mold grows fast in wet, dark environments. If it smells off, clean with a diluted bleach solution and rinse thoroughly.
In cold weather, carry an insulated sleeve for your drink tube — the tube freezes before the reservoir in below-freezing temps, leaving you with 3 liters of accessible water and no way to drink it.
Common questions about hiking water bottles
How much water do I need for a day hike?
Nalgene or Hydro Flask for hiking?
When should I use a hydration reservoir vs a bottle?
How do I clean a hydration reservoir?
Can I use a hiking water bottle for hot drinks?
The Hydro Flask 32oz is the right choice for most day hikers — insulation keeps water drinkable on warm trails, and the Flex Cap makes drinking on the move easier than a Nalgene. Start with the Nalgene if you're on a budget or hiking in cooler weather. Graduate to the CamelBak Crux reservoir once you're doing full-day hikes regularly.
The HobbyStack editorial team researches each guide using practitioner communities, published resources, and direct input from active hobbyists. Every guide is reviewed for accuracy before publication and updated when practices change.
About our editorial process →More gear guides
All guides
Best Beginner Hiking Backpack 2026: Osprey Daylite vs Talon vs Atmos
The right hiking backpack depends on one number: how long you plan to be out. Day hike → 20–30L. Overnight → 33–45L. Multi-day → 50–65L. Get the volume wrong and you're either cramming gear into too little space or hauling empty weight all day. Here are three Osprey packs, each sized for a different stage of hiking, that will outlast your beginner phase.

Best Beginner Hiking Boots 2026: Merrell Moab 3 vs Salomon X Ultra 4
Your first hiking boots need to do three things: not blister you, stay dry on wet trails, and grip technical terrain. The Merrell Moab 3 Waterproof checks all three for around $130. Here are three real boots: a non-waterproof breathable option, the waterproof all-rounder, and a stiffer upgrade for rocky terrain, each with a confirmed Amazon link.
Best Beginner Hiking Headlamp 2026: GearLight vs Black Diamond vs Petzl
A headlamp is not optional: it belongs in your pack on every hike, even day hikes. Trailhead emergencies, slower-than-planned descents, and headlamp-only summit attempts all happen. The question is which one to bring. Here are three picks across the price spectrum: a sub-$25 backup pair, the consensus day-hiking lamp, and Petzl's rechargeable powerhouse for longer days.

Best Beginner Trekking Poles 2026: Black Diamond Trail vs Distance Z
Trekking poles reduce knee impact by up to 25% on descents and add meaningful stability on uneven terrain. They're not optional once you start hiking with a loaded pack or doing technical descents. Here are three pairs: a no-frills starter, the consensus day-hiking pair, and a folding carbon option for hikers who want minimum weight.

Best Handheld GPS for Hiking (2026): 3 Rugged Picks That Work Off-Grid
A handheld GPS is rugged, reliable backcountry navigation that keeps working where your phone gives up: no cell signal needed, sunlight-readable screens, and batteries that last days, not hours. The choice comes down to whether you also want satellite SOS messaging for safety. Here are three good ones, all from Garmin, from a simple trail unit to a do-everything device with an emergency beacon.

Best Hiking First Aid Kit 2026: Surviveware vs AMK Watertight vs Backcountry
A first aid kit is mandatory on any hike beyond a paved trail. Blisters, cuts, sprains, allergic reactions, and hypothermia are all scenarios where having the right supplies on hand determines the outcome. Here are three kits that cover day hiking, weekend backpacking, and multi-day backcountry trips, each sized and stocked for what you'll actually encounter.