Best Beginner Trekking Poles 2026: Black Diamond Trail vs Distance Z
Trekking poles reduce knee impact by up to 25% on descents and add meaningful stability on uneven terrain. They're not optional once you start hiking with a loaded pack or doing technical descents. Here are three pairs: a no-frills starter, the consensus day-hiking pair, and a folding carbon option for hikers who want minimum weight.
HobbyStack may earn a commission from links on this page at no extra cost to you. Our picks are chosen on merit; the commission helps fund the research.
- Trekking poles reduce knee impact on descents by up to 25% and meaningfully improve balance on uneven terrain. If your knees ache after hikes, poles are the first upgrade to make.
- Our pick: Black Diamond Trail Cork (~$130 pair). FlickLock levers that don't slip under load, natural cork grips that wick sweat, adjustable from 100–130cm — the pair most experienced hikers recommend first.
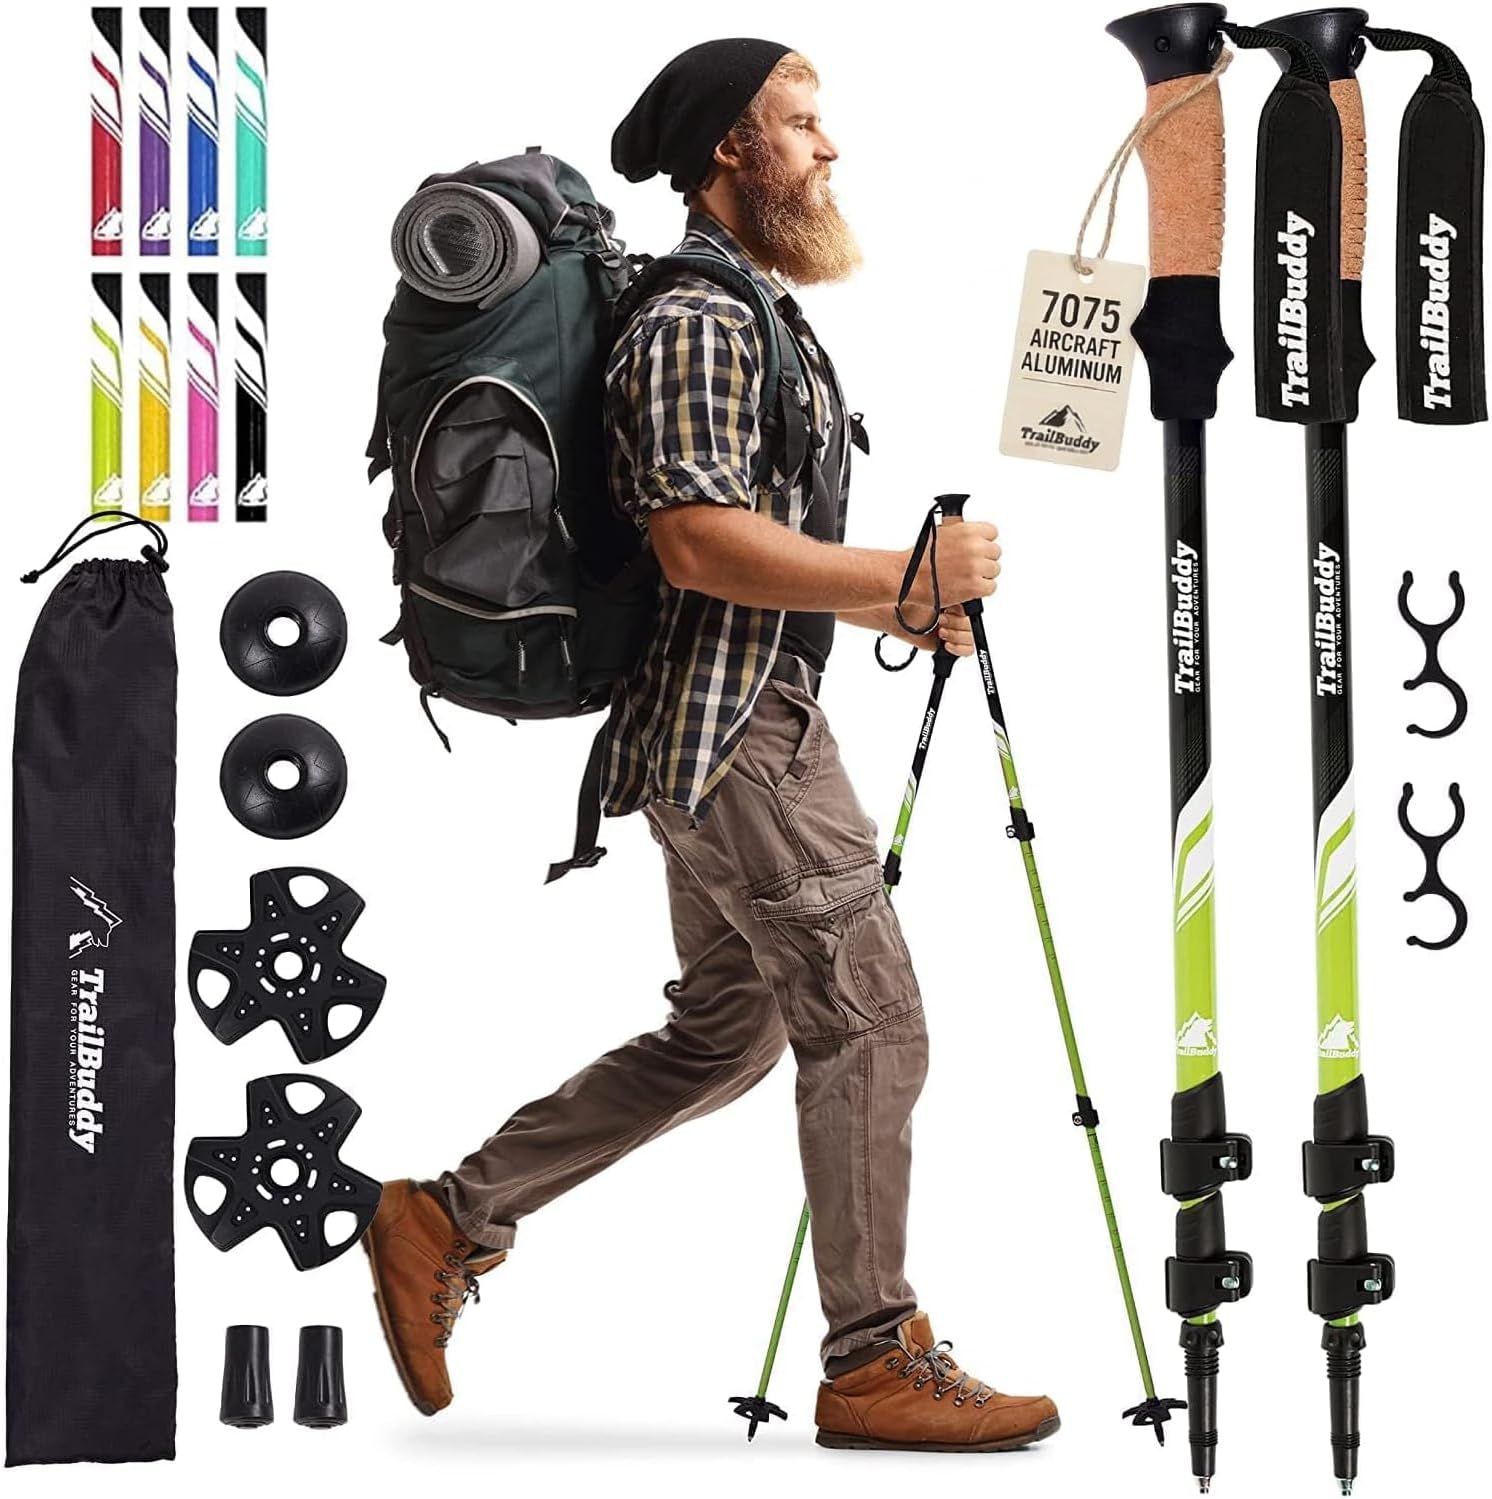
- Tight budget: TrailBuddy aluminum poles (~$45 pair). Twist-lock shafts and foam grips are less refined than Black Diamond, but they're real poles with real tips that work for casual day hiking.
- Minimum weight: Black Diamond Alpine Carbon Cork (~$230 pair). Carbon-fiber shafts shave real weight off long days, with the same cork grips and reliable FlickLock levers as the Trail Cork. The pick for hikers who count grams.
- Adjust for terrain: poles should reach elbow height on flat ground. Lengthen by 5–10cm on descents to reduce knee impact; shorten by 5–10cm on uphills to improve cadence.


Why trekking poles matter more than most beginners expect
Most first-time hikers skip poles because they look unnecessary. Within a month of hiking with a real pack and real elevation, most of them reconsider. On descents — especially long, steep ones with loose footing — poles plant forward and absorb a percentage of the impact that would otherwise travel through your knees. After 5–8 miles of descent, that difference is felt. On uneven surfaces (rocky trails, stream crossings, steep switchbacks), poles add two more contact points with the ground, which meaningfully improves stability and reduces the number of ankle-rolling near-misses.
The other case for poles is pack weight. Once you're carrying 20+ lbs, balance shifts and your ankles and knees work harder on technical terrain. Poles offset this — particularly on loose scree or off-trail routes where there's no predictable footing.
How we picked
We filtered on: adjustment mechanism (FlickLock lever > twist-lock — levers are faster to adjust and don't slip under load), grip material (cork absorbs sweat better than foam; foam is fine for casual use), shaft material (aluminum lasts forever; carbon is lighter but can snap rather than bend on hard strikes), collapse or fold mechanism (three-section collapse vs Z-fold — Z-fold is more packable but less adjustable), and tip quality (tungsten carbide tips last significantly longer than steel). Budget twist-lock poles work; they just require regular tightening and don't have the refinement of FlickLock mechanisms.
 Best for most hikers
Black Diamond Trail Cork Trekking Poles
The Black Diamond Trail Cork is the pair most experienced hikers recommend to beginners who want to buy once. The FlickLock lever adjustment is the key upgrade over cheap twist-lock poles — it locks the extension position firmly under load and adjusts in two seconds with one hand, while twist-lock mechanisms require two hands and gradually loosen under vibration. Natural cork grips conform to your hand shape over time and absorb sweat better than foam, which matters on long days. The aluminum shaft won't snap on a hard impact (unlike carbon), making it the right material choice for hiking in rocky terrain. Tungsten carbide tips are standard and last through years of regular use.
What's good
- FlickLock lever adjustment — faster and more secure than twist-lock
- Natural cork grips wick sweat and conform to hand shape over time
- Aluminum shaft: won't snap on hard impact unlike carbon poles
- Tungsten carbide tips last years with regular use
- Adjustable 100–130cm covers most adult heights
What's not
- Heavier than carbon poles (~8.8 oz per pole)
- Three-section collapse doesn't stow as small as Z-fold poles
- Cork grips take a few days to break in
 Best under $50
TrailBuddy Lightweight Trekking Poles
The TrailBuddy poles are the right first pair for a hiker who wants to try poles before committing to $90+. They're lightweight aluminum, include both carbide tips and rubber tip protectors (for pavement), and use twist-lock adjustment that works reliably when tightened properly before heading out. The foam grips are comfortable for shorter hikes. The main limitation vs Black Diamond is the twist-lock mechanism — it requires both hands to adjust, loosens faster under vibration than FlickLock, and needs checking before each hike. For casual day hiking under 10 miles, this isn't a dealbreaker. For technical terrain, loaded packs, or anything more serious, upgrade to FlickLock poles.
What's good
- Under $50 for a solid starter pair
- Carbide tips included
- Rubber tip protectors for pavement
- Lightweight aluminum shaft
- Anti-shock wrist straps with cork tops
What's not
- Twist-lock adjustment loosens under vibration — check before each hike
- Two-handed to adjust — can't fine-tune on the fly like FlickLock
- Foam grips absorb sweat less well than cork on long days
 Best for lightweight hikers
Black Diamond Alpine Carbon Cork Poles
The lightweight upgrade for hikers who count grams. The Black Diamond Alpine Carbon Cork poles pair carbon-fiber shafts — noticeably lighter than aluminum — with the same natural cork grips and reliable FlickLock adjustment as the Trail Cork. Carbon damps trail vibration and shaves weight off every step on a long day, and the three-section design still packs down for travel. Carbon can crack under a sharp side-load where aluminum would bend, so they suit hikers who want minimum weight over maximum ruggedness, but for going far and fast they are superb.
What's good
- Carbon shafts — lighter than aluminum on long days
- Natural cork grips and reliable FlickLock levers
- Damps trail vibration for less hand fatigue
- Three sections pack down for travel
What's not
- Carbon can crack under a hard side-load (aluminum bends)
- Premium price for a weight-focused upgrade
The standard starting length is elbow height on flat ground. On long descents, lengthen by 5–10cm — longer poles let you plant further forward, which reduces the load your knees absorb on each step. On steep uphills, shorten by 5–10cm to keep your arms in an efficient pumping position. You can do this on the fly with FlickLock poles in about 10 seconds per pole — one reason FlickLock is worth paying for.
Before you buy
Plant the pole tip level with or slightly behind your leading foot on uphills. On descents, plant ahead of your foot to brake and absorb impact.
Use wrist straps correctly: push your hand up through the strap from below, then grip the pole. This way the strap bears weight on the upstroke so you don't have to grip as hard — much less arm fatigue over a long day.
Check twist-lock poles before every hike — vibration loosens them. Extend, tighten until you feel resistance, then give a half-turn more. If a section collapses under body weight, it's not tight enough.
Store poles collapsed with the tips up to prevent dirt from packing into the adjustment mechanism. Rinse the mechanisms with clean water after muddy or sandy hikes.
For river crossings, extend your poles longer than normal and plant them upstream to brace against the current. Use them as a tripod — two poles and one foot always in contact.
Common questions about beginner trekking poles
Do beginners actually need trekking poles?
One pole or two?
Aluminum vs carbon trekking poles?
FlickLock vs twist-lock poles?
How do I size trekking poles?
Do trekking poles help with knee pain?
The Black Diamond Trail Cork poles are the right first pair for most hikers — FlickLock adjustment that stays put, cork grips that feel better the more you use them, and aluminum that won't snap. If you're not sure you'll use poles, start with the TrailBuddy pair and upgrade once you're converted.
The HobbyStack editorial team researches each guide using practitioner communities, published resources, and direct input from active hobbyists. Every guide is reviewed for accuracy before publication and updated when practices change.
About our editorial process →More gear guides
All guides
Best Beginner Hiking Backpack 2026: Osprey Daylite vs Talon vs Atmos
The right hiking backpack depends on one number: how long you plan to be out. Day hike → 20–30L. Overnight → 33–45L. Multi-day → 50–65L. Get the volume wrong and you're either cramming gear into too little space or hauling empty weight all day. Here are three Osprey packs, each sized for a different stage of hiking, that will outlast your beginner phase.

Best Beginner Hiking Boots 2026: Merrell Moab 3 vs Salomon X Ultra 4
Your first hiking boots need to do three things: not blister you, stay dry on wet trails, and grip technical terrain. The Merrell Moab 3 Waterproof checks all three for around $130. Here are three real boots: a non-waterproof breathable option, the waterproof all-rounder, and a stiffer upgrade for rocky terrain, each with a confirmed Amazon link.
Best Beginner Hiking Headlamp 2026: GearLight vs Black Diamond vs Petzl
A headlamp is not optional: it belongs in your pack on every hike, even day hikes. Trailhead emergencies, slower-than-planned descents, and headlamp-only summit attempts all happen. The question is which one to bring. Here are three picks across the price spectrum: a sub-$25 backup pair, the consensus day-hiking lamp, and Petzl's rechargeable powerhouse for longer days.
Best Beginner Hiking Water Bottle 2026: Nalgene vs Hydro Flask vs CamelBak
Dehydration is the most common cause of early hike turnarounds and trail emergencies. The solution is simple: carry enough water and actually drink it. Here are three hydration options: the indestructible trail standard, the insulated bottle that keeps drinks cold all day, and the hands-free reservoir system for longer and hotter hikes.

Best Handheld GPS for Hiking (2026): 3 Rugged Picks That Work Off-Grid
A handheld GPS is rugged, reliable backcountry navigation that keeps working where your phone gives up: no cell signal needed, sunlight-readable screens, and batteries that last days, not hours. The choice comes down to whether you also want satellite SOS messaging for safety. Here are three good ones, all from Garmin, from a simple trail unit to a do-everything device with an emergency beacon.

Best Hiking First Aid Kit 2026: Surviveware vs AMK Watertight vs Backcountry
A first aid kit is mandatory on any hike beyond a paved trail. Blisters, cuts, sprains, allergic reactions, and hypothermia are all scenarios where having the right supplies on hand determines the outcome. Here are three kits that cover day hiking, weekend backpacking, and multi-day backcountry trips, each sized and stocked for what you'll actually encounter.