Best Bottling Wand (2026): Fill to the Brim, Then Let It Drop
A bottling wand looks like a length of tube with a valve on the end, and the clever part is what happens when you lift it out. You fill the bottle right to the brim, and withdrawing the wand removes exactly its own volume, leaving the correct headspace every time without measuring anything.
HobbyStack may earn a commission from links on this page at no extra cost to you. Our picks are chosen on merit; the commission helps fund the research.
- Fill to the very top. Pulling the wand out leaves the right headspace automatically.
- Splashing means oxygen, and oxygen means stale cardboard flavours in weeks.
- Sanitise the wand inside and out. It touches every single bottle.
- Too little headspace means gushers. Too much means flat beer.
- Stainless outlasts plastic and does not scratch, which matters for sanitising.
 Plastic spring tipA first batch$8Check price
 Our pickFermtech with tubingMost brewers$12Check price
 UBREW stainless kitBrewing regularly$18Check price
How the trick works
The wand is a rigid tube with a spring-loaded valve at the bottom tip. Press the tip against the base of a bottle and the valve opens; lift it and the valve shuts. Beer flows only while the tip is pressed down.
That gives you two things at once.
No splashing. The tube reaches the bottom of the bottle, so beer fills from underneath rather than falling through air. That matters far more than it sounds, because splashing beer after fermentation dissolves oxygen into it, and oxygen produces stale, wet-cardboard flavours within a few weeks. Post-fermentation oxygen is one of the few genuinely irreversible mistakes in brewing.
Automatic headspace. You fill until the beer reaches the very top of the bottle, which feels wrong the first time. Then you lift the wand out, and the beer level drops by exactly the volume the wand occupied. That leaves about an inch, which is the headspace you want, in every bottle, without judging anything by eye.
Headspace matters in both directions. Too little and there is not enough gas volume for carbonation, so pressure builds high and you get gushers. Too much and the beer has more oxygen sitting on top of it and comes out under-carbonated.
Keep the bottle tilted slightly and let it fill gently. A wand removes most of the splashing, not all of it.
Sanitising, and the rest of bottling day
The wand touches every bottle, so it is one of the highest-risk items in the process for infection. Sanitise inside and out, and remember the inside of a tube is easy to skip.
No-rinse sanitiser is standard. Fill the wand, let it stand for the contact time, and let it drain rather than wiping it dry with anything.
Plastic scratches, and scratches harbour bacteria. A scratched plastic wand cannot reliably be sanitised because the organisms sit below the surface where the sanitiser does not reach. That is the real argument for stainless: not strength, but that a smooth non-porous surface stays sanitisable for years.
Replace tubing periodically. Vinyl tubing goes cloudy and slightly sticky with age, and that haze is exactly the kind of surface you cannot properly clean.
Then priming sugar, which is where the batch is won or lost. Carbonation comes from a measured dose of sugar fermented in the sealed bottle. Add it to the bottling bucket and stir gently rather than dosing each bottle, or the carbonation varies wildly across the batch.
Stir gently. You are mixing sugar evenly without whipping air into the beer, which brings us back to oxygen.
Do not scale sugar by guesswork. Too much priming sugar is the classic cause of exploding bottles, and the safe amount depends on the beer style, the volume and the temperature the beer finished at.
Leave bottles somewhere warm for two weeks, then refrigerate. Cold stops the yeast working before carbonation is complete.
 Best for a first batch
Plastic Spring Tip Bottle Filler
A plain plastic wand with a spring tip, which is all the mechanism this job actually needs, and it does the automatic headspace trick just as well as anything dearer. For a first batch it is the obvious buy, since you may discover you would rather keg. It is wand only, so you need tubing to connect it to your bottling bucket. Plastic scratches over time, and scratches are where sanitiser stops reaching.
What's good
- Does the same headspace trick as any wand
- Cheapest possible way to bottle properly
- Light and easy to handle one-handed
- Nothing to go wrong mechanically
What's not
- Wand only, tubing not included
- Plastic scratches, and scratches harbour bacteria
- Shorter life than stainless
- Flexes if you press hard
 Best for most brewers
Fermtech Spring Bottle Filler
The same spring-tip mechanism supplied with six and a half feet of food-safe certified tubing, which is the practical difference: you have a working setup out of the box rather than a wand and a trip for hose. Fermtech is the name most homebrew shops stock, so replacement tips and spares are easy to find. Still plastic, so it will scratch eventually, but the length of tubing means the bucket can sit above the bottles comfortably.
What's good
- Includes 6.5 ft of food-safe tubing
- A complete working setup out of the box
- Widely stocked, so spares are easy
- Enough hose to raise the bucket properly
What's not
- Still plastic and will scratch with age
- Tubing goes cloudy and needs replacing
- No stainless durability
- Tip can stick if not rinsed after use
 Best for brewing regularly
Professional 14" Stainless Steel Spring-Loaded Bottle Filler
Fourteen inches of stainless steel with a spring-loaded valve and six and a half feet of NSF-rated tubing. The argument for stainless is not strength but sanitation: a smooth non-porous surface can be reliably sanitised for years, where scratched plastic hides organisms below the surface where sanitiser does not reach. The extra length reaches the bottom of taller bottles. It is more than a once-a-year brewer needs.
What's good
- Stainless stays sanitisable for years
- Does not scratch the way plastic does
- 14 inches reaches the base of tall bottles
- NSF-rated tubing included
What's not
- Over twice the plastic wand
- Heavier in the hand over a long bottling session
- More than an occasional brewer needs
- Still needs the tubing replaced eventually
Bottle bombs are almost always too much priming sugar, or bottling before fermentation actually finished. Take gravity readings on consecutive days and only bottle when they stop changing, then measure priming sugar for the volume, style and final temperature rather than estimating. Store carbonating bottles in a box or a plastic crate somewhere they cannot hurt anyone, and never use bottles that were not made to hold pressure.
Bottling day, in order
Sanitise everything first, then keep it wet with sanitiser until you use it. Half the mistakes on bottling day come from setting a sanitised item down on an unsanitised surface.
Rack rather than pour. Siphon the beer off the yeast into the bottling bucket, keeping the tube below the surface so it does not splash.
Add dissolved priming sugar to the bucket, not to each bottle, and stir gently with a sanitised spoon so it distributes without aerating.
Fill from the bottom. Wand to the base of the bottle, press, fill to the brim, lift.
Cap immediately. An open filled bottle is picking up oxygen and anything in the air.
Two weeks somewhere warm, around room temperature, for the yeast to eat the priming sugar. Cold slows or stops it, which is why bottles moved to a cold garage never carbonate.
Then chill and check one. If the first is under-carbonated, give the rest another week rather than concluding it failed.
Label them. You will not remember which batch is which in three months, and you will want to know which one worked.
Before you buy
Check whether tubing is included, or you cannot use it.
Stainless if you brew often. Plastic if you are trying it.
Measure the wand against your tallest bottles.
Sanitise the inside of the tube, not just the outside.
Replace cloudy tubing rather than trying to clean it.
Bottling wand questions
How full should I fill a beer bottle?
Why does headspace matter?
Is a stainless wand worth it over plastic?
Why did my bottles explode?
The Fermtech with tubing is the sensible buy, because a wand without hose is not a working setup and this arrives as one for a couple of dollars more than the bare plastic version. Take the plain plastic wand if you already have tubing and want to bottle a first batch cheaply. Move to the stainless kit once you brew regularly, since a surface that stays sanitisable is worth more than the price difference.
Ready to actually do it?
The first homebrewing quest takes an evening, and it tells you whether the gear was worth it better than any review can.
Start HomebrewingThe HobbyStack editorial team researches each guide against manufacturer specifications, published resources and practitioner sources. Every product is checked for availability and described against its current listing before publication, and prices are re-checked when guides are updated.
About our editorial process →More gear guides
All guides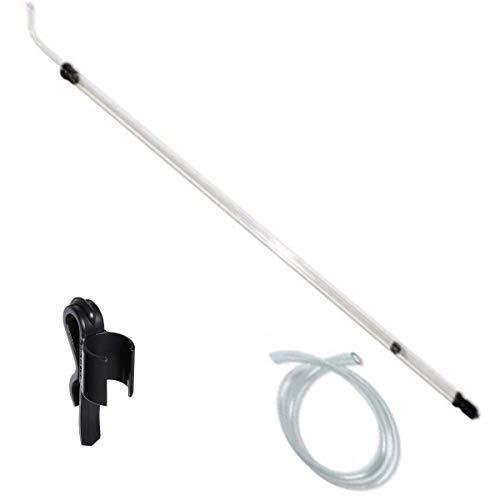
Best Auto-Siphon (2026): Move the Beer Without Moving the Trub
Racking is moving beer off the sediment it has dropped, and there are two ways to ruin it. One is stirring up the trub so it comes with you. The other is splashing, which dissolves oxygen into finished beer and produces a stale, wet-cardboard flavour weeks later. An auto-siphon exists to avoid both, and it costs less than a bag of hops.
Best Brewing Sanitizer (2026): Clean First, Then Sanitise
More homebrew is ruined by infection than by any mistake in the recipe, and almost all of it traces back to one misunderstanding: cleaning and sanitising are two separate steps, and sanitiser does nothing on a surface that is not already clean. The good news is that the standard product costs very little and works in thirty seconds.

Best Brewing Thermometer (2026): Two Degrees Changes the Beer
Mash at 150°F and you get a dry, crisp beer. Mash at 156°F and you get a fuller, sweeter one from exactly the same grain bill. That is a six-degree window deciding the character of the finished beer, which makes an accurate thermometer less of an accessory than a recipe ingredient.

Best Beginner Winemaking Kit 2026: Craft a Brew vs North Mountain vs Master Vintner
Good news first: making wine at home is more forgiving than it sounds, and you don't need a cellar or a chemistry degree to end up with something you'd actually pour for a friend. A starter kit gives you the gear to ferment, rack, and bottle, and you supply the juice or fruit and a little patience. The catch nobody mentions is that "kit" means two different things. Some are all-in-one boxes with the juice included so you can start tonight, and some are just the reusable equipment that expects you to bring your own ingredients. This guide sorts out which is which, and picks three genuinely good ones: the easiest way to try it, the best gear for most beginners, and the full-size rig to grow into.

Best Pot for Cheese Making (2026): Milk Scorches Where the Pan Is Thin
Milk is unforgiving in two specific ways. It reacts with bare aluminium and copper, which taints the curd and discolours the pan, and it scorches wherever the base has a hot spot — and once a batch has caught, the whole thing tastes of it. Both problems are solved by the same purchase, and neither is solved by watching more carefully.
Best Beginner Home Coffee Roaster 2026: Nuvo vs Fresh Roast SR540 vs Behmor 1600
Home roasting is one of those rare hobbies where the result is measurably better than what you can buy. Get the right roaster and you'll drink the best coffee of your life within a month.