Best Camera Bag for Beginners (2026): How You Get At Your Kit
Most people buy a camera bag on capacity and regret it on access. The question that decides whether a bag gets used is how you reach the camera: if getting the body out means putting the bag on the ground and unpacking it, you will leave the camera in the bag and stop taking pictures. Everything else — padding, weather cover, laptop sleeve — is secondary to that.
HobbyStack may earn a commission from links on this page at no extra cost to you. Our picks are chosen on merit; the commission helps fund the research.
- Access beats capacity. A bag you can get into without taking it off is a bag you actually shoot from.
- Rear-panel access puts the opening against your back — harder to pickpocket, and it keeps the straps out of the mud.
- Buy for the kit you own, not the kit you imagine. Half-empty bags let gear slide around.
- A built-in rain cover is worth more than it sounds, and costs almost nothing in weight.
- Anonymous beats branded. A bag that shouts "camera" is a bag that gets stolen.
 Lowepro Tahoe BP 150One body, two lenses$90Check price
 Our pickLowepro Flipside 200 AW IIMost people$150Check price
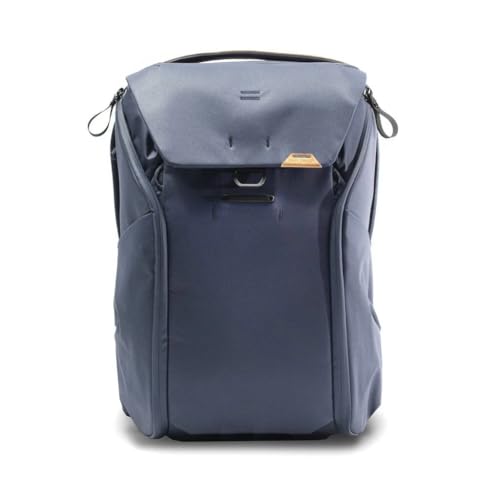 Peak Design Everyday Backpack V2 30LCamera plus everything else$240Check price
The four ways into a bag
Top-loading opens at the top like a rucksack. Simple and cheap, but you dig, and anything at the bottom is effectively in storage.
Rear-panel unzips the side that sits against your back. You swing it round, open it facing you, and everything is laid out at once. It cannot be opened while you are wearing it, which is the point — a thief cannot open it either.
Side access lets you swing the bag to one side and pull the body out without taking it off. The fastest for a single camera, and the reason working photographers like it.
Shoulder bags and slings give the quickest access of all and become miserable past a few kilos, because it all hangs off one shoulder.
If you are choosing blind, rear-panel is the safest default: secure, organised, and it does not put the strap side in the dirt when you set it down.
Size it to the kit you have
The common mistake is buying for an imagined future kit. A bag with two lenses rattling around in a space built for six does not protect anything — the dividers only work when they are under tension against something.
A body with a lens attached, plus one or two spare lenses, is what most people carry for years. That is a small bag. If it also has to hold a laptop, a jacket and lunch, you are shopping for a daypack that happens to take a camera insert, which is a different product and usually a better buy than a bigger camera bag.
One practical check before buying: airline carry-on limits. A 30L bag is at the edge, and camera gear is the one thing you cannot put in the hold.
 Best simple starter
Lowepro Tahoe BP 150, Camera Bag, Lightweight Compact Camera
A small top-loading backpack sized almost exactly for what a beginner actually owns: a body with a lens on it and one or two spares, plus a tablet. It is light, it is cheap, and the padding is genuinely adequate. What you give up is access — top-loading means the bag comes off and goes on the ground, and anything underneath the top layer needs unpacking to reach. For walking somewhere, shooting, and walking back, that is fine. For a day of moving between shots it will quietly discourage you from changing lenses. Buy it if the budget is tight or the kit is small, and expect to want rear or side access eventually.
What's good
- Light and genuinely compact
- Cheapest way to carry a kit safely
- Sized for a realistic beginner kit
- Does not look like an expensive camera bag
What's not
- Top-loading: bag off, on the ground, unpack to reach
- No rain cover
- Little room to grow
- Basic harness for longer walks
 Best for most people
Lowepro Flipside 200 AW II Camera Backpack
The bag that solves the access problem without costing what a lens costs. It opens through the rear panel, so you swing it round, unzip the side that was against your back, and see the whole kit laid out at once instead of digging. Because that panel faces you when worn, it also cannot be opened behind you in a crowd, which is a real advantage in a city. The AW is a rain cover that lives in a pocket in the base and pulls over the whole bag in seconds. Dividers are properly adjustable so the kit stays put rather than sliding. If you buy one camera bag and want to stop thinking about it, this is the one.
What's good
- Rear-panel access — organised and hard to pickpocket
- Built-in rain cover
- Genuinely adjustable dividers
- Comfortable for a full day
What's not
- Cannot be opened while worn
- Bulkier than a sling for a single body
- Laptop space is tight
- Unmistakably a camera bag up close
 Best if it is also your everyday bag
Peak Design Everyday Backpack V2 30L
This is a well-made daypack that takes a camera, rather than a camera bag you can also put a jumper in — and that distinction is the whole reason to buy it. Side access on both flanks means you swing it round and pull the body out without taking it off. The dividers fold origami-style so the internal layout genuinely reconfigures rather than just moving a wall, and with the camera out it works as an ordinary bag. It costs more than twice the mid pick and it is heavier empty. Worth it if this is the only bag you want to own; hard to justify if it will only ever carry a camera.
What's good
- Side access without removing the bag
- Reconfigurable dividers, genuinely flexible
- Works as a normal daypack
- Build quality justifies the price
What's not
- More than twice the mid pick
- Heavy before anything goes in
- Latch system takes learning
- 30L is at the edge of carry-on
Bags with a large maker's logo tell everyone in the street there is a few thousand pounds of gear on your back. Plain bags, or bags that read as ordinary daypacks, get left alone. It is the cheapest security decision in photography, and it costs nothing at the point of purchase.
Inserts: the cheap way out
If you already own a rucksack you like, a padded camera insert drops into it and turns it into a camera bag for a fraction of the price of a new one. You get the harness you already know, no camera branding at all, and the insert lifts out when you want the bag back.
What you lose is speed — access is whatever the host bag offers, usually top-loading — and a little space to the insert's own walls. For someone carrying a camera occasionally rather than daily, it is often the better buy.
Before you buy
Decide how you want to reach the camera first. Everything else is secondary.
Size for the kit you own now, not the kit you might buy.
Check for a rain cover — retro-fitting one is awkward and they weigh almost nothing.
If it must carry a laptop, measure the laptop. Stated sizes are optimistic.
Consider an insert in a bag you already own before buying a dedicated one.
Camera bag questions
What size camera bag should a beginner buy?
Is rear-panel access actually worth it?
Backpack or shoulder bag?
Can I just use a normal rucksack?
Choose on access, then size. The Lowepro Flipside 200 AW II is the one to buy for most people — rear-panel access, a built-in rain cover, and dividers that hold a kit properly. Take the Tahoe if the budget is tight and the kit is small, and accept you will be putting it on the ground. The Peak Design Everyday V2 is worth it only if this is also your everyday bag rather than a dedicated camera one. And if you already own a rucksack you like, try a padded insert first.
Ready to actually do it?
The first photography quest takes an evening, and it tells you whether the gear was worth it better than any review can.
Start PhotographyThe HobbyStack editorial team researches each guide against manufacturer specifications, published resources and practitioner sources. Every product is checked for availability and described against its current listing before publication, and prices are re-checked when guides are updated.
About our editorial process →More gear guides
All guides
Best Beginner Mirrorless Camera 2026: Canon EOS R50 vs Sony ZV-E10 II
The best beginner mirrorless camera teaches you photography, not menus. It needs reliable autofocus, a grip that makes sense, and enough image quality to reward good technique. The Canon EOS R50 with its kit lens is the right camera for most people who are just starting out. Here's why, and who should buy something different.

Best Camera Tripod for Beginners (2026): 3 Real Picks
A tripod unlocks the shots you cannot get handheld: long exposures, low light, sharp landscapes, self-portraits, and steady video. The good news is a beginner does not need a $600 one. Any stable tripod that holds your camera perfectly still does the core job; what more money buys is less weight, faster setup, and a sturdier hold as your gear grows. Here are three across the range, plus what actually matters when you choose.

Best First Camera Lens for Beginners (2026): 3 Nifty Fifties by Mount
The kit zoom that came with your camera is fine, but a cheap, fast prime lens is the upgrade that suddenly makes your photos look better. The classic first buy is a 'nifty fifty': a 50mm f/1.8 lens that is sharp, tiny, brilliant in low light, and cheaper than almost anything else you can put on your camera. The one catch is that lenses are not universal, so you have to match the lens to your camera's mount. Here are three good first primes in ascending price, plus how to find the right one for your camera brand.
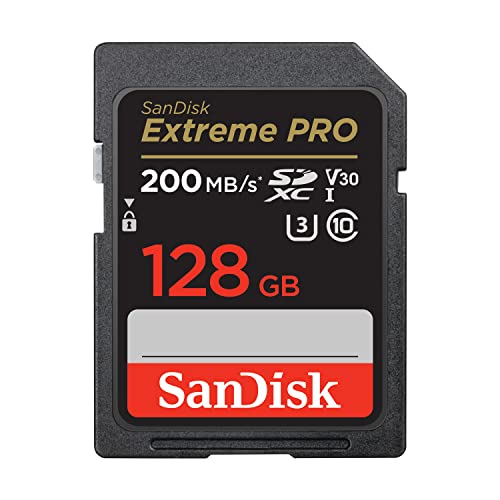
Best SD Card for Photography 2026: SanDisk Extreme PRO vs Ultra vs Sony TOUGH
A memory card is the one piece of gear that, if it fails, costs you the photos themselves: so it's worth getting right, even though it's the cheapest thing in the bag. The good news: the choice comes down to speed class, and most photographers need far less than the marketing implies. A fast V30 UHS-I card handles burst stills and 4K; UHS-II is a video upgrade most cameras can't even use. Here's the honest breakdown.

Best Remote Shutter Release (2026): Check the Mount Before Anything Else
At macro magnifications, pressing the shutter button is enough to blur the shot. Depth of field is measured in millimetres and any vibration you introduce is magnified along with the subject, which is why a remote release is not a convenience here the way it is in normal photography. The catch is that these are not universal, and the compatibility list is the whole purchase.

Best Drawing Tablet for Beginners 2026: XP-Pen Deco vs Wacom Intuos vs Huion Kamvas
Your first drawing tablet is where digital art begins, and the first decision is the big one: a screenless pen tablet (cheaper, lighter, what most pros use) or a pen display you draw directly on (instantly natural, but two to four times the price). The honest answer for almost everyone is start screenless. Here are three picks and which one fits where you are.